What Is a Core Build? The Foundation of a Great Van Conversion

If you’ve spent any time looking into van conversions, you’ve probably heard the term “core build” thrown around. But what does it actually mean, and why does it matter?

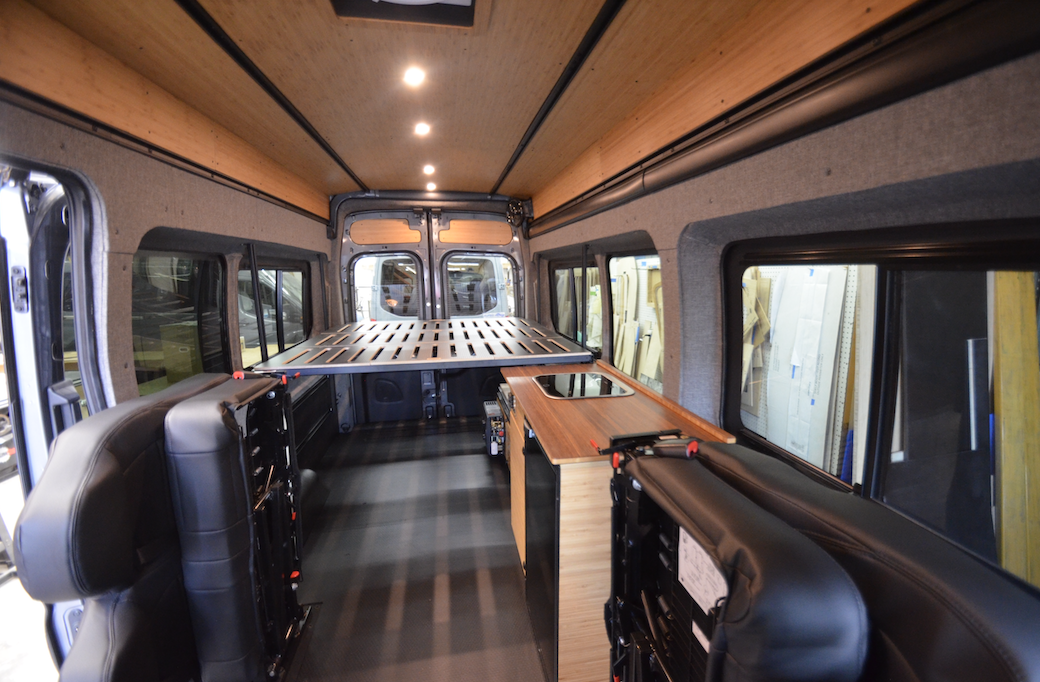
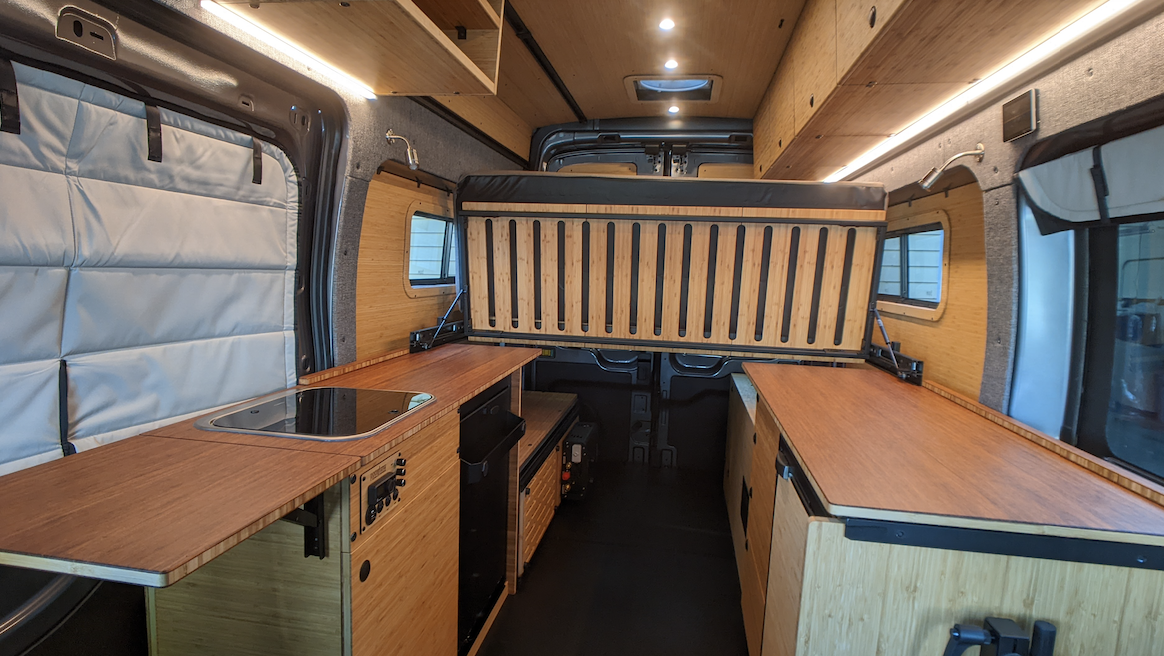
At Roost Vans, the core build is the first step in any van building journey. I always describe it like a sheet-rocked house. The wiring is behind the walls, the windows are in, the paneling is on. There are no cabinets, no bed, no plumbing yet. It’s a built-out shell that’s been intelligently engineered to already know where those things are going to go. So when you’re ready to take that next step, the van is ready for you.

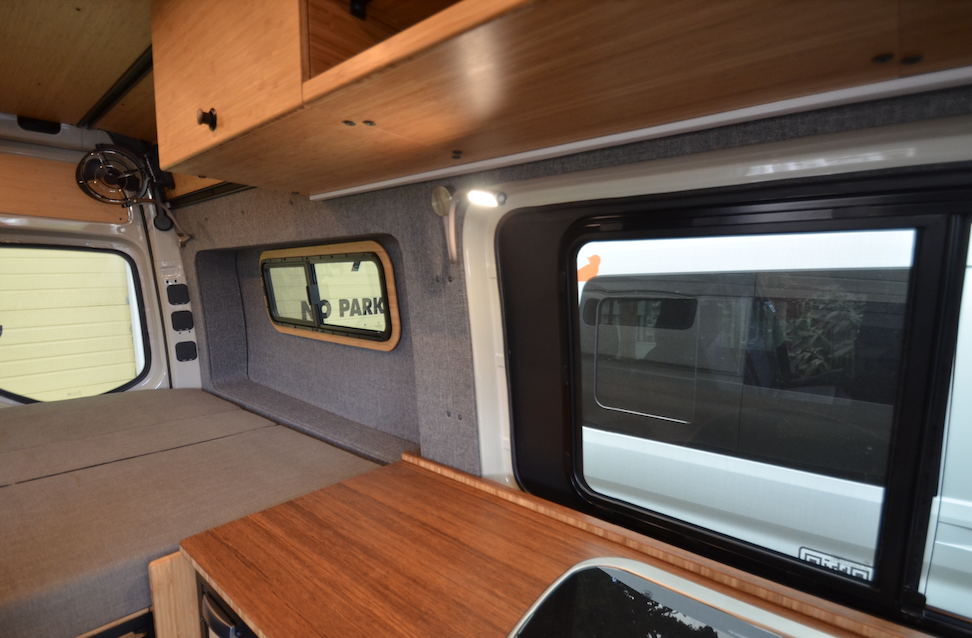
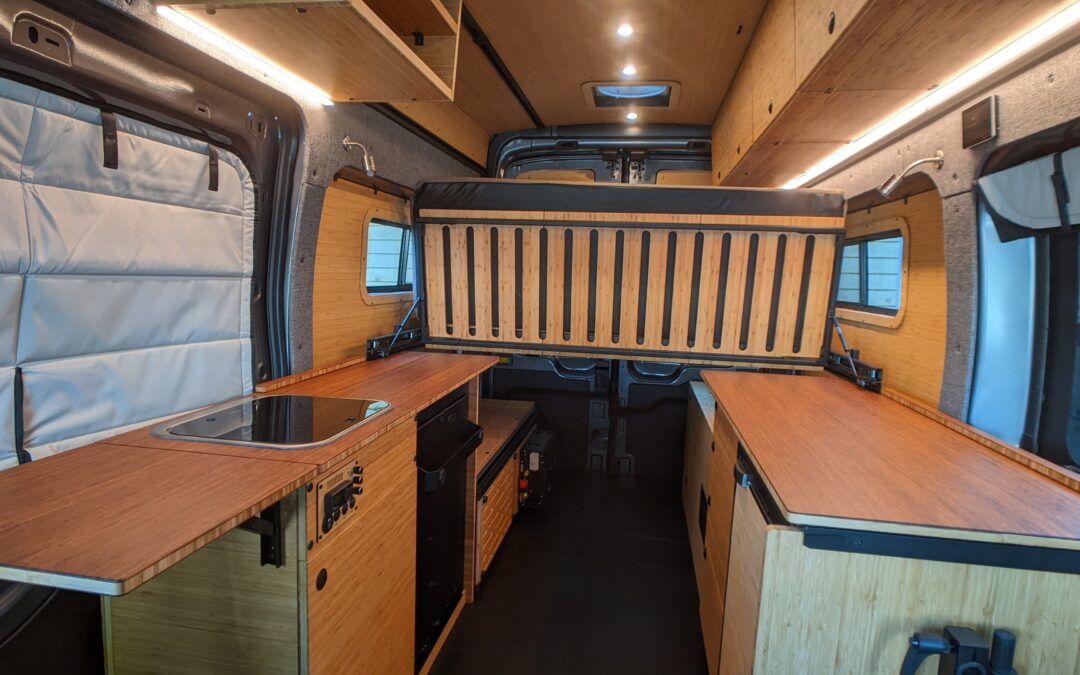
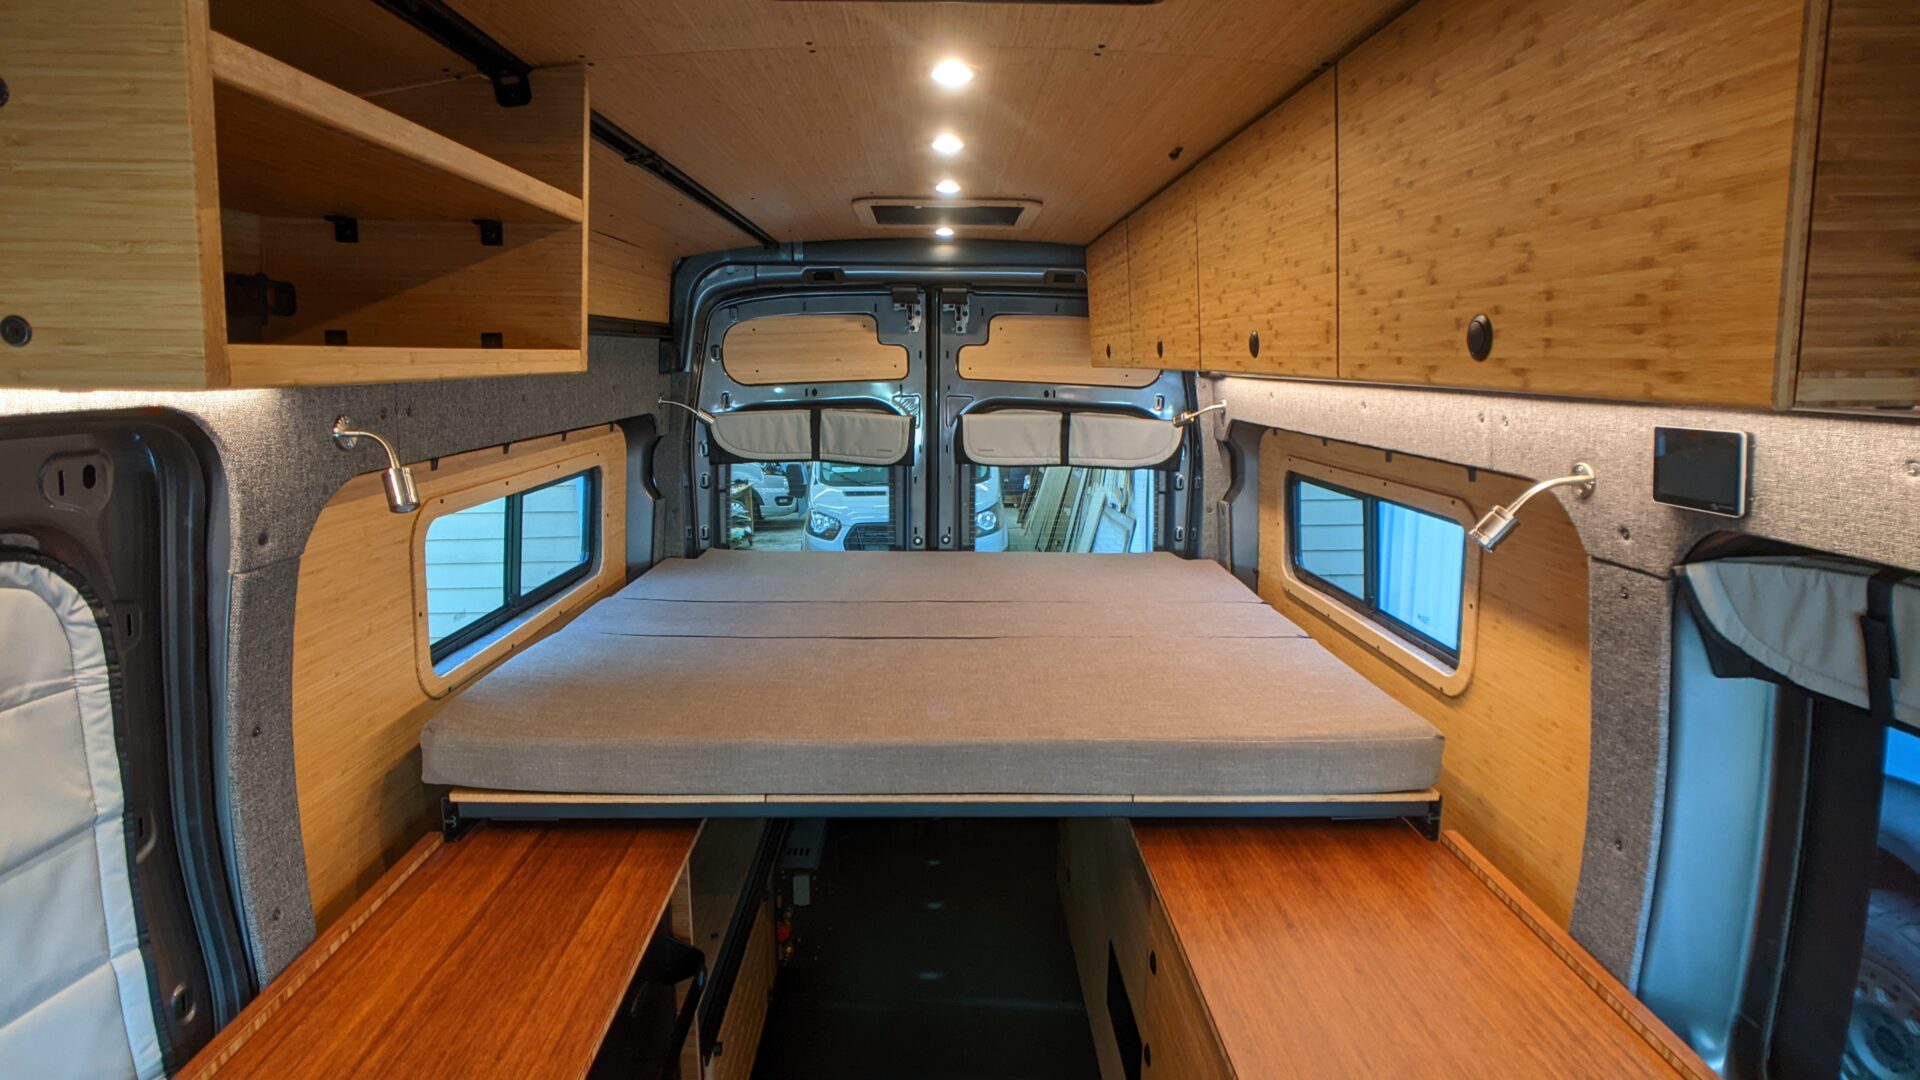
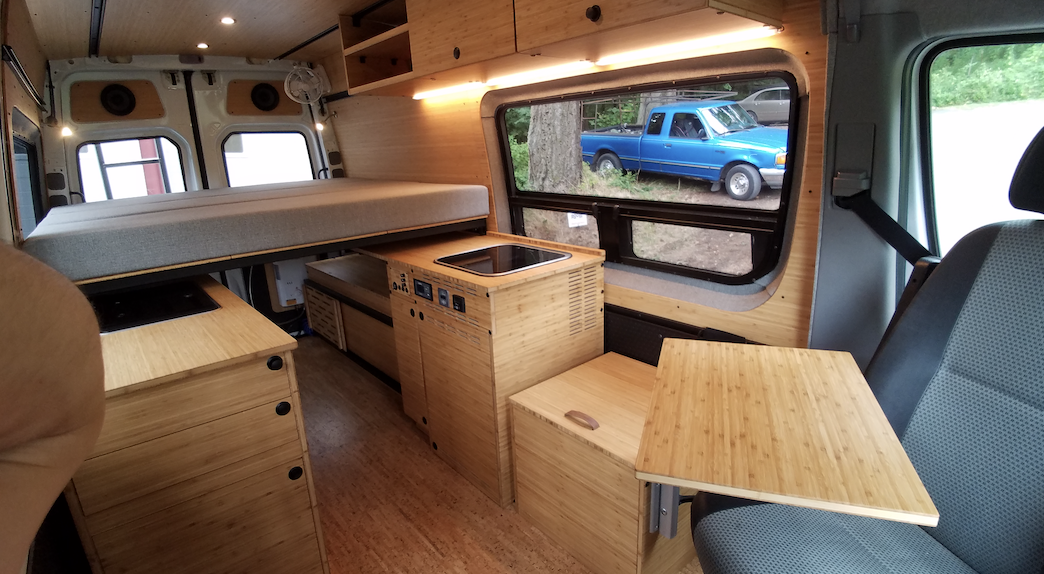
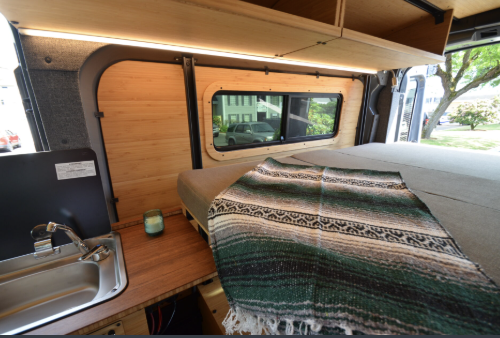
Interior of a camper van showing a bed on the left, upper wooden cabinets, and a wood counter by a large window.

What’s Actually Included

A core build covers a lot of ground. Here’s what we typically do at Roost Vans:

Smooth Rail Mounting System: All of our vans start here, and everything after the core build mounts to this flexible robust system. A bit of up front work pays dividends in quality and speed of the main build later. Don’t build a van without it. Trust us.

Windows, Vent fan and Seating. We primarily work with AM Auto glue-in style windows, and for good reason. We’ve had far better luck with longevity and no leaking compared to clamp-in styles. Pill windows are a popular option for the back half of vans, especially if you’re planning a bed system and want airflow while you sleep.

And depending on how far you want to go, we also typically install a vent fan, a heater, pull tested seating, and any add-ons that make sense for your situation before continuing onto the electrical.

Electrical. A standardized core wiring system goes in with a switch plate and power panel for power distribution that can be integrated well with a power station. The wiring is behind the walls before the paneling goes up, so everything is clean and ready to expand.

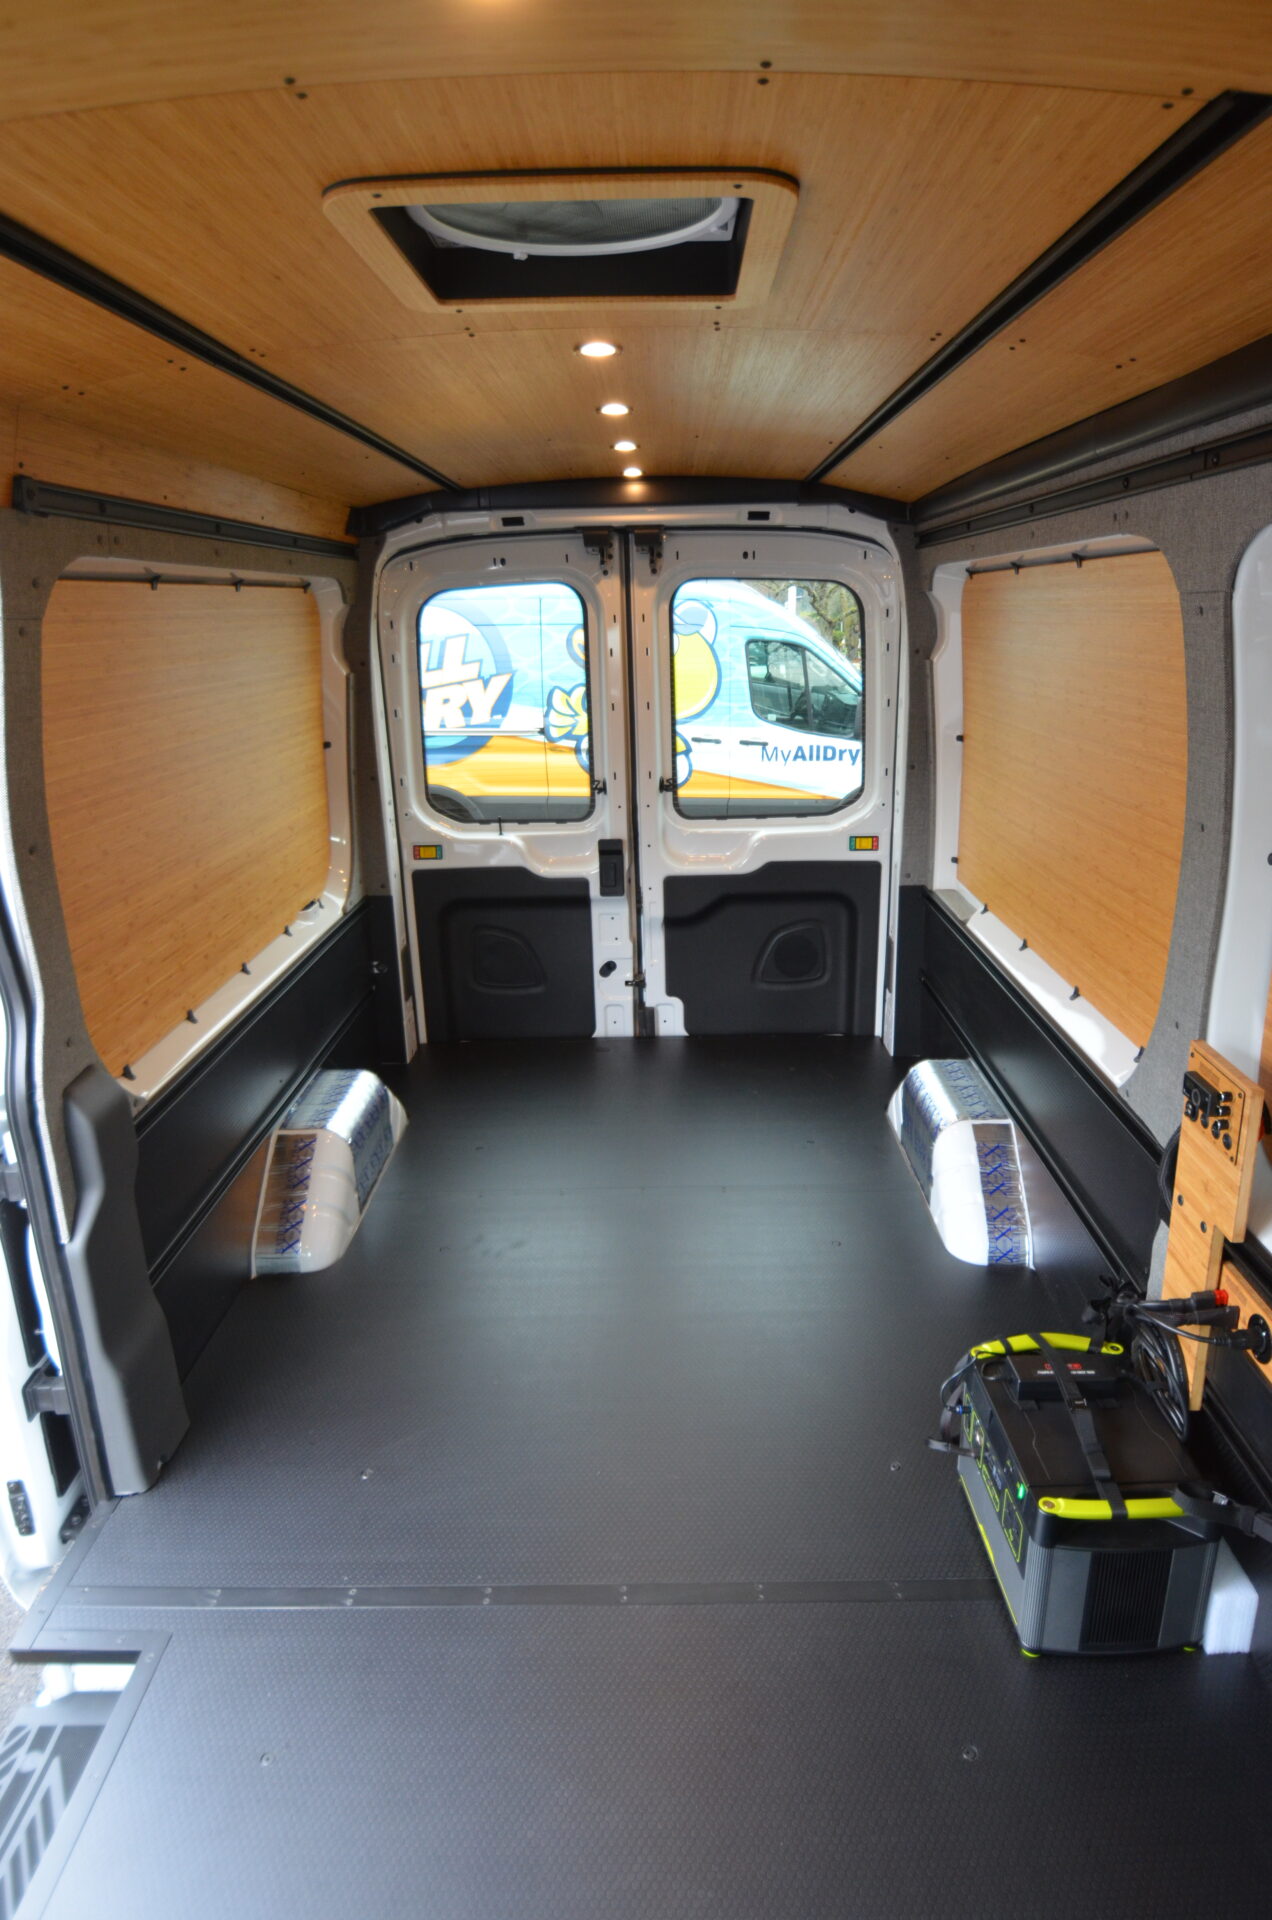
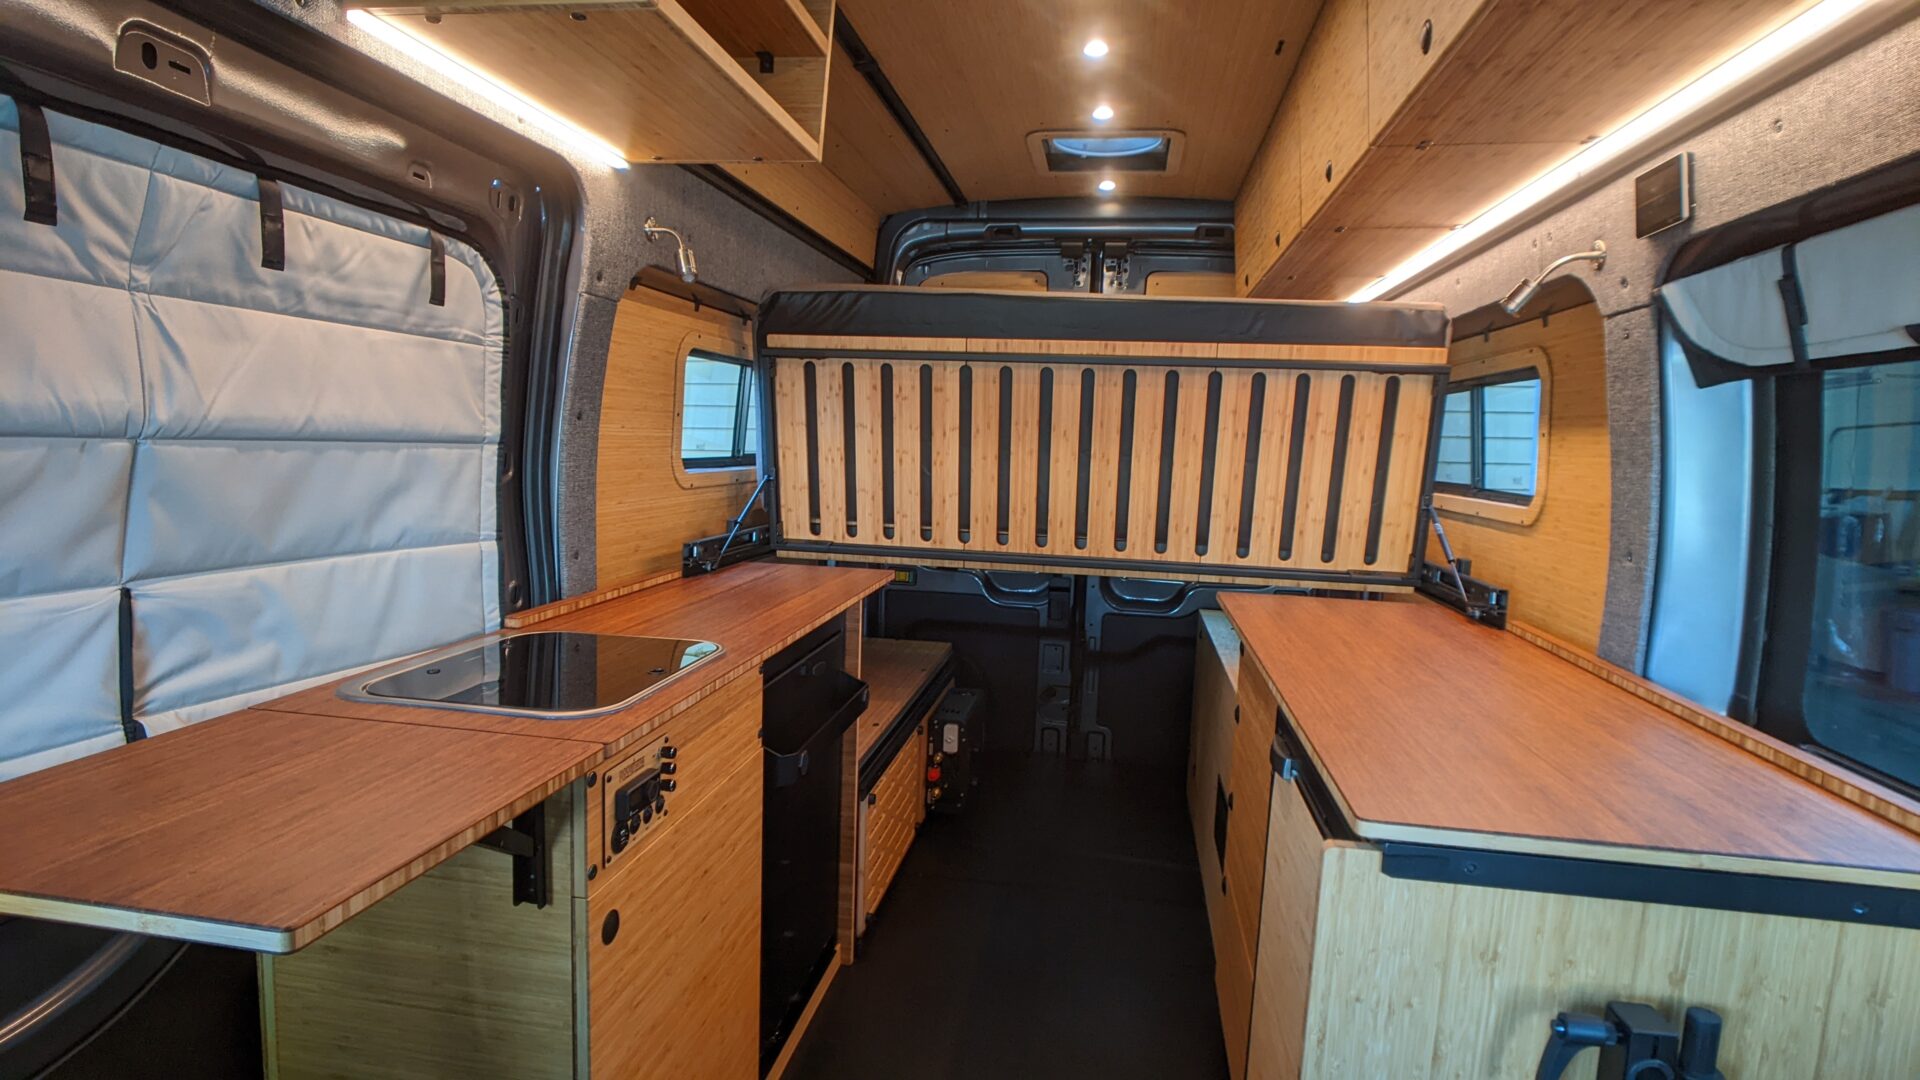
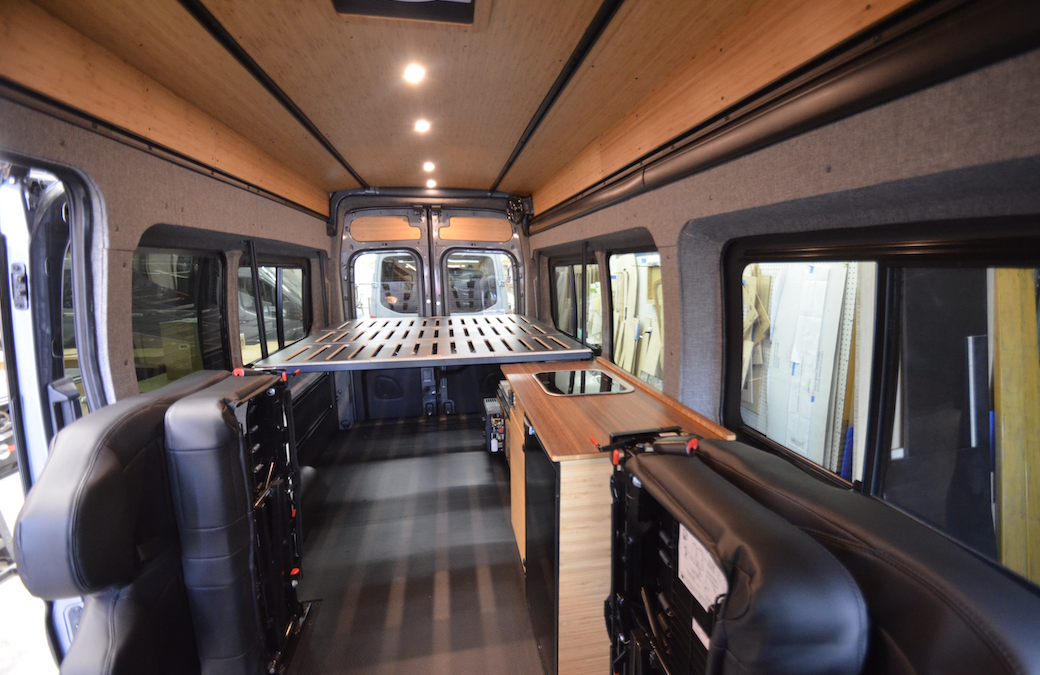
Interior of a cargo van with wooden panel walls and ceiling, back double doors, and a black rubberized floor; LED lights along the ceiling and a ceiling vent visible at top center.

Insulation and sound suppression. When vans roll off the factory floor, you can barely hold a conversation inside them while they’re moving. That changes after a core build. We use Rattle Trap on key areas to kill the drum effect of the metal, and then we layer in Thinsulate wherever we can get it. Behind the headliner, in the ceiling pockets, behind the doors. It makes a significant difference both thermally and acoustically. We don’t over-engineer it chasing diminishing returns with 100% coverage, but what we do is targeted and effective.

Paneling. We primarily use bamboo, and it’s a material we’re genuinely proud of. Finished in Osmo hard wax, it’s easy to maintain and refinish. No outgassing and lasts for years and years. Unlike laminate. Paneling is also available as unfinished baltic birch, or fabric-wrapped. The upper, mid, and lower wall paneling all integrate directly with our smooth rail mounting system, and everything is serviceable, meaning you can pull a panel without dismantling your whole build.

Flooring. We use a half-inch hex ply anti-skid flooring material, screwed into rivnuts so the floor stays serviceable if you ever need to get under it. It comes as a DIY-shippable kit, or we’ll install it in the shop.

Why It’s Built Around the Smooth Rail System

Everything in the core build is designed around our interior Smooth Rail Mounting System. It’s what makes the whole thing flexible. When you have a vehicle traveling down the highway at 75 mph, you want every component locked in securely. But you also want the ability to move things around, swap out components, or add to the build later. The rail system makes all of that possible without pulling apart the whole van.

The Phased Build Approach

One of the biggest reasons people choose Roost Vans for their core build is budget flexibility and not being 100% sure on how exactly they want their van built. Maybe you don’t know exactly how you want to use your van yet. Maybe you want to live in it for a few months before committing to a full buildout. A core build lets you drive a functional, quiet, insulated van while you figure that out.

Customers come back to us two, three, sometimes four times to add onto their build. Others get everything done at once. Either way works, and the core build is engineered to support both paths.

Some people have us do the core build in the shop, then handle everything after that themselves, using Roost products or other aftermarket components they’ve chosen. That’s a perfectly valid way to do it, and one of the unique strengths of our system.

Can You Do It Yourself?

Yes. We offer the electrical system, the mounting system, the paneling, the flooring kit, and support for insulation, vent fans, and windows as DIY products. Some customers have us come in for the pieces they don’t want to tackle, like window installation or electrical, and then handle the rest on their own. There’s a lot of flexibility there.

The Bottom Line

The core build is not the flashy part of a van conversion. It’s not the cabinetry or the countertops or the rooftop deck. But it is the reason everything else works as well as it does. A well-done core build means your van is quiet, insulated, wired, paneled, and ready for whatever comes next.

We do core builds here in our Portland, Oregon shop, and we also support builders all over the country and internationally through our product ecosystem. However you want to approach your build, it starts with Roost Vans.

What a Full Roost Vans Build Looks Like

What a Full Roost Vans Build Looks Like

Every once in a while we finish a van that’s a really good example of what a complete Roost build looks like when you stack everything together the way we intended it.

A recent 2024 AWD Transit is one of those vans.

Instead of walking you through it panel by panel, I want to zoom out a little and show you what’s actually happening underneath the pretty parts, because that’s what matters.

A full build isn’t just cabinets and a bed, it starts with the Core.

The Core Build

I say this a lot, the Core Build is like sheetrock in a house and everything underneath.

Our Core includes:

  • Mounting System
  • Electric
  • Insulation
  • Wiring 
  • Flooring
  • Upper, Mid, and Lower Paneling
  • Vent fan, windows, power station and heater

At the center of that is our: Smooth Rail Mounting System

Everything mounts to it:

If you want to add something later, you’re not drilling random holes into your van and hoping for the best. We built it this way because people need change, and we don’t like building vans that paint you into a corner.

Power

Here’s where people either overspend or underthink: Power.

In a full build like this one, we scaled it up to power and include:

  • 800 amp-hours of battery to power an autonomous Dometic RTX 2000 air conditioner
  • Engine, Shore power, and Solar charging
  • Victron monitoring
  • Espar heater

All of that runs through our: Power Panel

The idea behind the Power Panel is simple… bring all your wiring to one centralized spot so it’s clean and expandable.

It’s not magic… You still have to wire things correctly. But the heavy lifting is done and you’re not creating a spaghetti monster behind your cabinets. If you want a deeper dive into how we think about batteries, solar, and what actually drains power, I wrote a full piece on it here: Deep Thoughts: On Power in a Van 

Most people don’t need as much battery as they think they do. Unless you want to run A/C off-grid for hours. Then we need to talk.

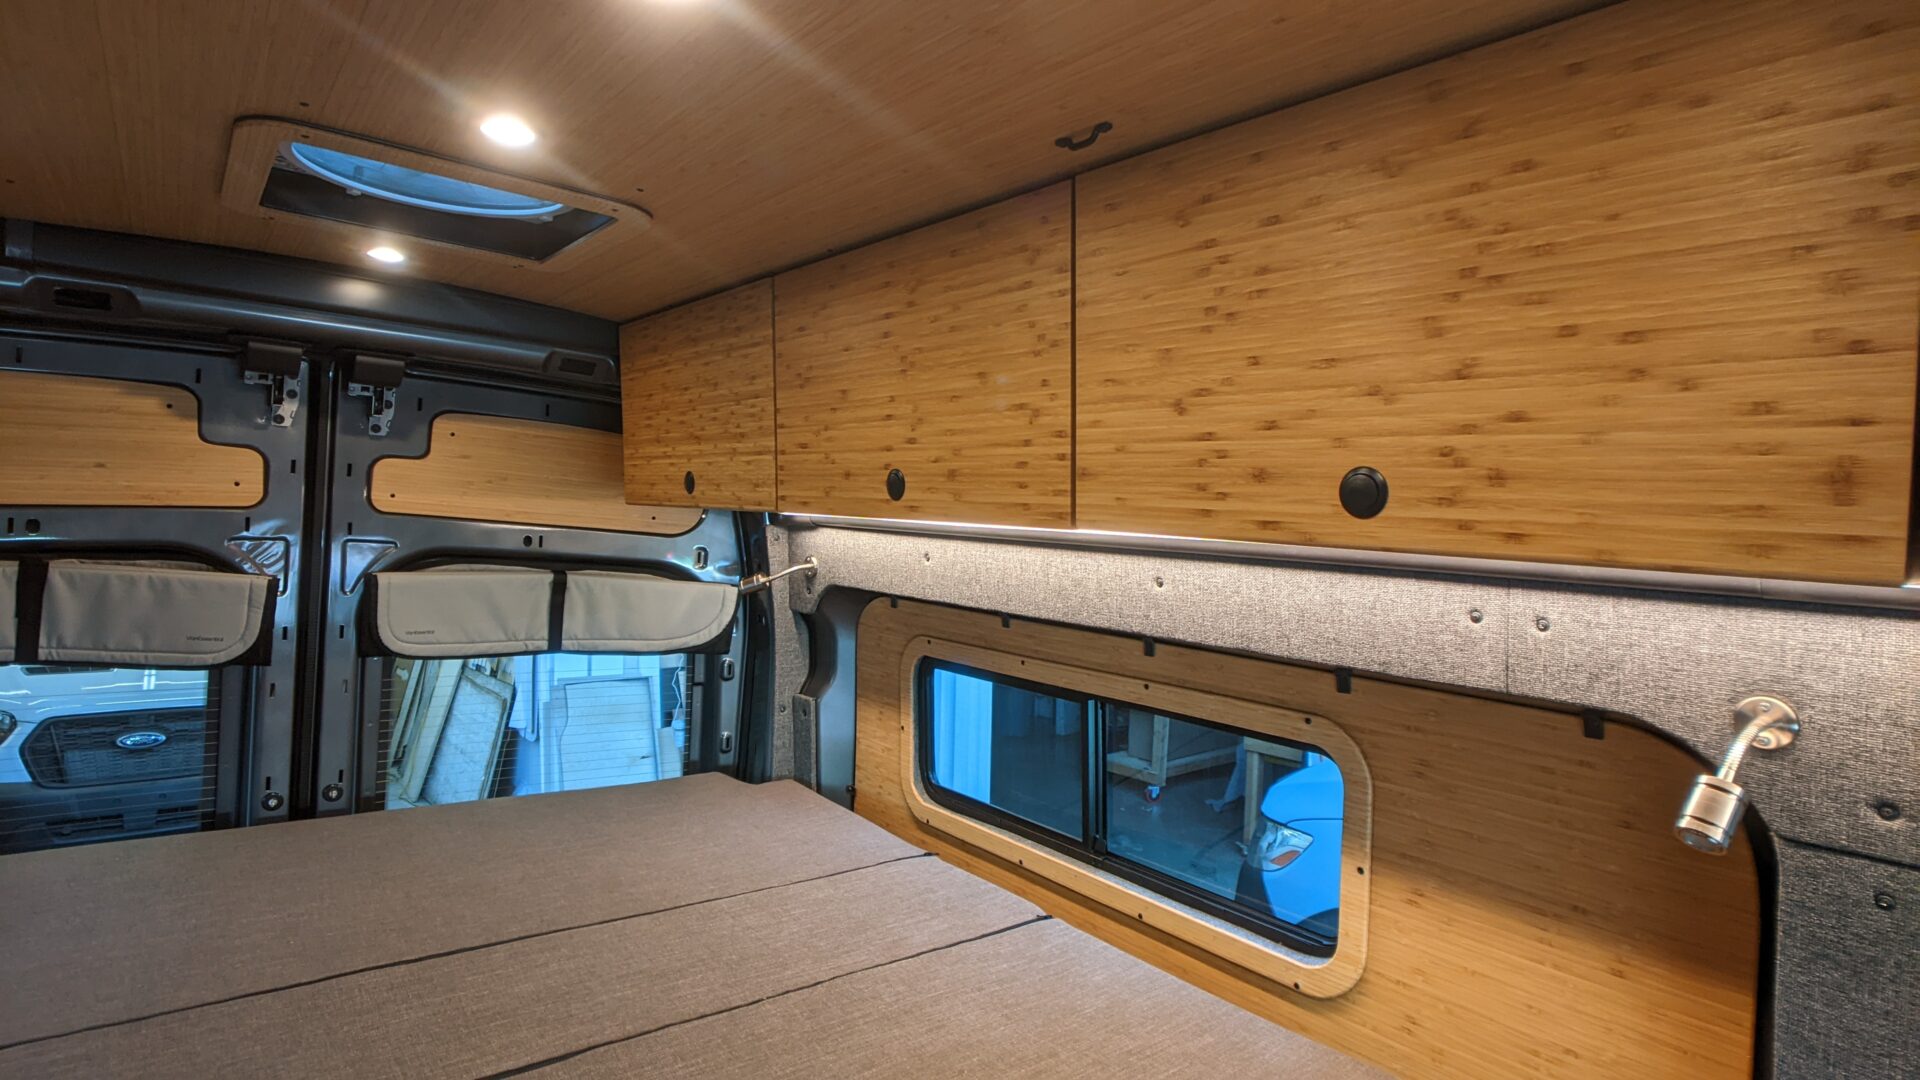
Interior of a camper van with oak plywood overhead cabinets, a small desk, and built‑in lighting along the wall edge.

Paneling

There was a time when van paneling meant three weekends, a YouTube tutorial, and a lot of regret. We don’t do that anymore. Our paneling integrates with the Smooth Rail Mounting System so you can remove a panel later without tearing apart the van.

Upper, mid, lower: finished bamboo, unfinished bamboo, HexPly, fabric wrap… whatever direction you want to go.

In this build, we paired HexPly flooring with powder-coated trim and Minicel underneath. It’s durable, serviceable, inexpensive, finished, and best of all, it doesn’t squeak.

If you want the full rant on paneling, it’s here: Roost Vans Thoughts on Paneling

Short version: it should be clean and serviceable. Not traumatic.

Cabinetry

Once the Core is in, cabinetry becomes easy, because it’s mounting to something intentional.

In a full build like this, that can include:

Driver Side Kitchen Cabinet

Drawer Cabinet

Upper Cabinetry

We often upgrade to stranded (fossilized) bamboo countertops. They hold up, and they look good. We hide kickplate drawers in the base cabinets because there is nothing worse than wasted space in a van.

Everything ties back to the van rail system. So if something needs to change later, it can.

Sleep

Beds in vans tend to take over, ours doesn’t.

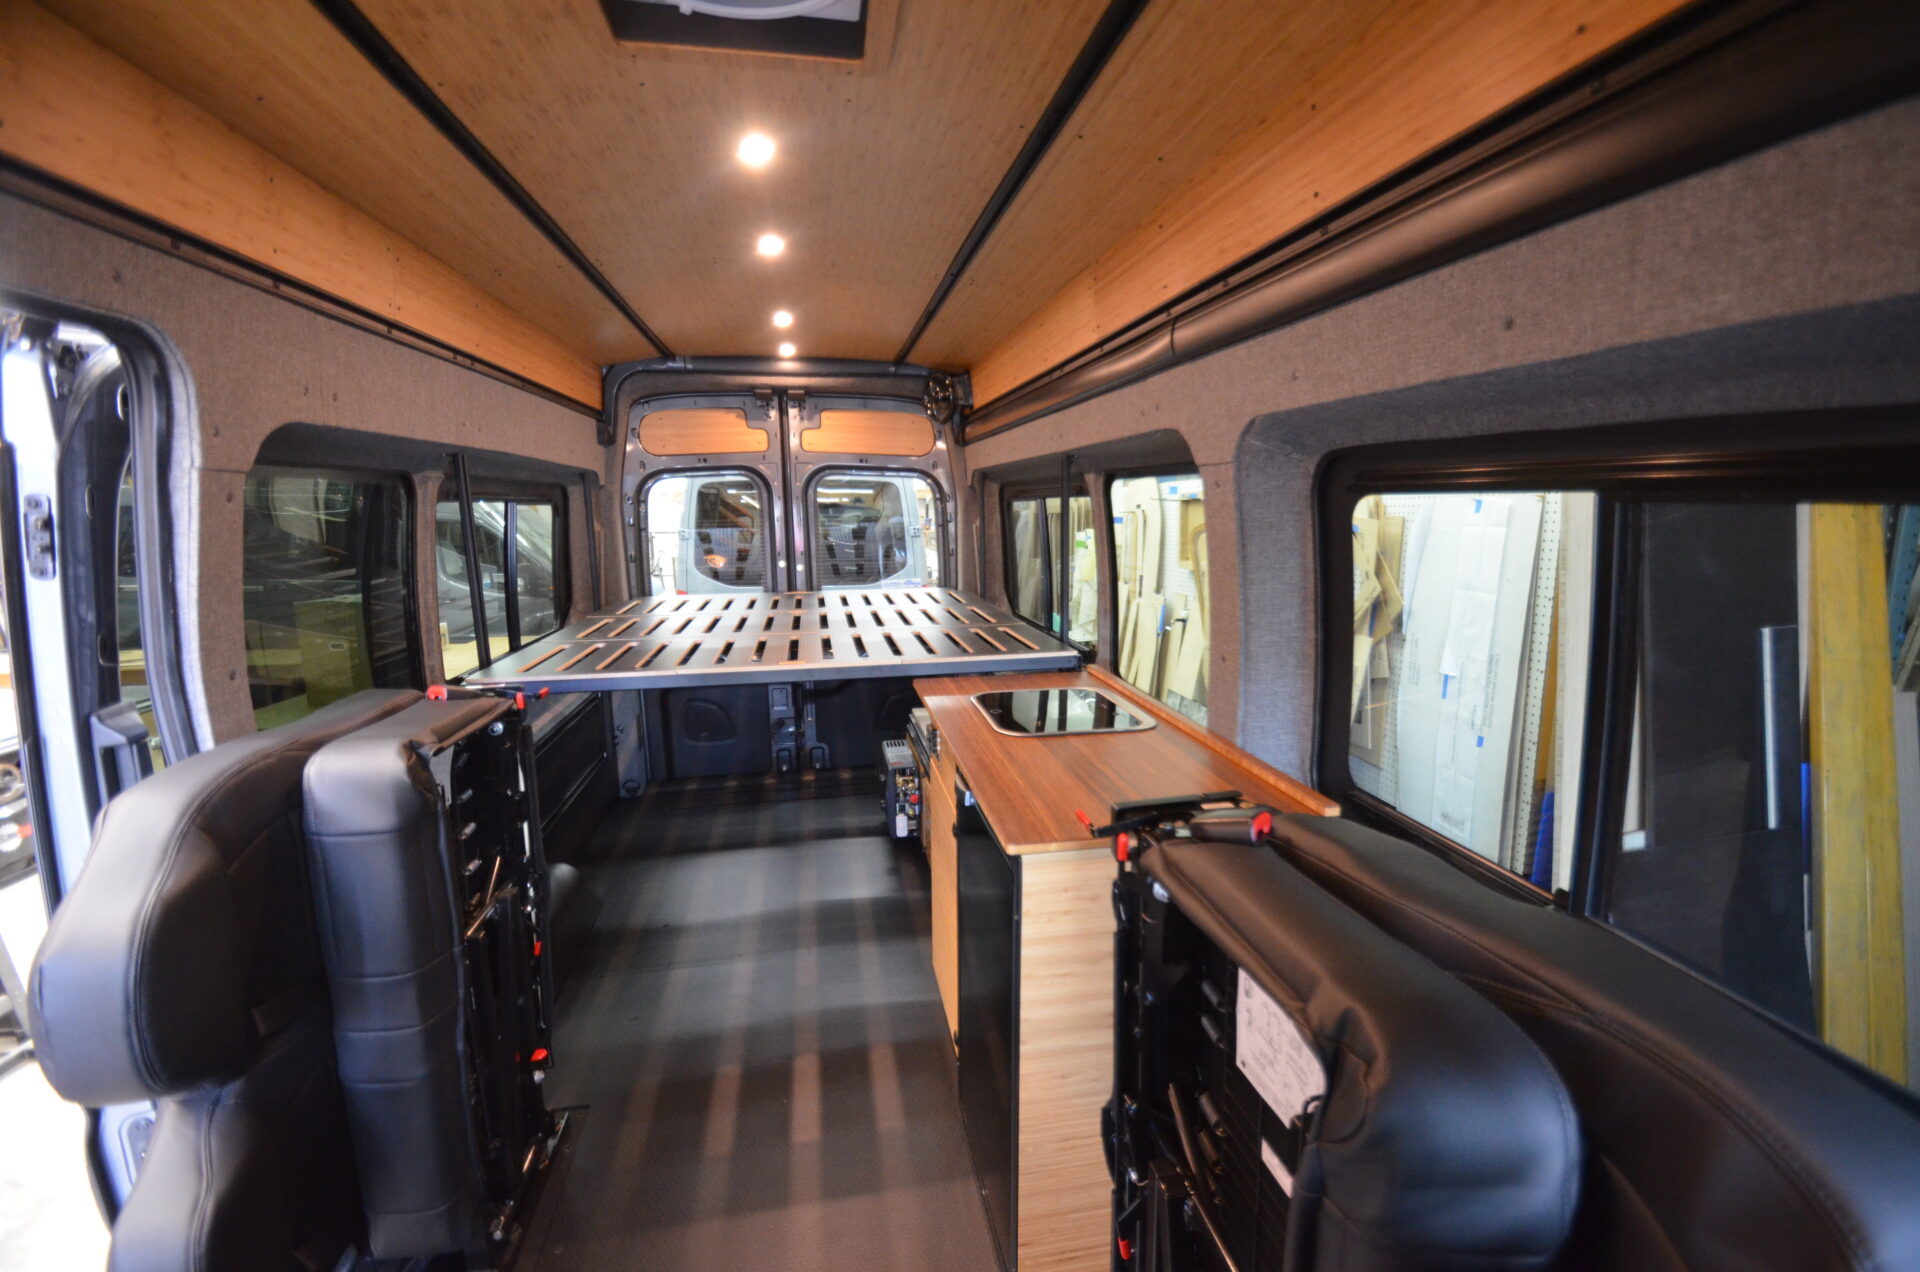
The Fu-Kit Bed System paired with our Mattress can be configured two-panel, two-and-a-half, or three-panel. You can also add our Flip-Up Kit, which gives you a sofa and garage access. Plus you gain 24” of counter top space on each side.

Keep it Simple Stupid

This build runs a 20-gallon over-the-wheel-well tank with interior fill:

  • No unnecessary holes punched in the van body.
  • Fresh water monitoring.
  • Battery monitoring.
  • Pump switch.

= Straightforward.

For toilets, we stick with the Loo Bench.

Paired with the Stansport EasyGo Loo. We like this option because there are no chemicals. no composting fans pulling power 24/7, and no diaper-genie situations.

If you want the long explanation of why we don’t overcomplicate toilets, it’s here:
Roost Vans Thoughts on Toilets in Vans <link to blog

Most people just need a place to pee at 2 a.m. Let’s not turn it into a science experiment.

Climate Control

With 800 amp-hours and proper charging, we can run:

  • Dometic RTX 2000 A/C
  • Espar heater

Heating and cooling are only complicated if the power system isn’t designed for it. When it is, it just works.

Full Build

A full Roost build isn’t about cramming every possible feature into a van.

It’s about layering systems correctly:

  • Rail system
  • Power infrastructure
  • Modular paneling
  • Intentional cabinetry
  • Flexible bed system
  • Right-sized water system
  • Simple toilet solution

Everything builds on the previous layer. That’s what you’re seeing in this Transit. It’s not flashy for the sake of being flashy. It’s built so you can use it… Fix it… Upgrade it… And not be scared of it.

We’ve embedded the full walkthrough video below so you can see how all of this actually comes together in a real van.

If you’re thinking about a phased build, a DIY install, or having us do a full conversion, this is a solid example of what’s possible.

You can explore all of our systems and products at: roostvans.com

Build it simple.
Build it serviceable.
Then go use it.

Deep Thoughts on Planning and Layout

Planning a camper van layout sounds simple at first.

Put a bed in the back, maybe a kitchen along the side, add some storage and call it good.

But once you start working through the details—seating, sleeping arrangements, water, power, gear storage—you quickly realize that van layout design is really a process of prioritization and compromise.

At Roost Vans we’ve built well over a hundred vans over the years, and one of the biggest lessons we’ve learned is that the most functional layouts come from deciding what actually matters most, and not trying to fit everything into the van.

This article is a deeper dive into how we think about planning and layout when building camper vans.

Start With Priorities (Not Products)

The first question we ask customers has nothing to do with cabinetry or materials… It’s about how the van will be used.

Typically the priority list looks something like this:

  1. Seating
  2. Sleeping
  3. Kitchen / cooking
  4. Storage
  5. Power

Seating tends to be the biggest driver because it immediately affects how much usable floor space you have.

For example:

  • A second-row bench seat opens the van up for families, but takes up a significant footprint.
  • A two-person cab-only setup gives you far more design freedom.

Once seating is determined, the rest of the layout starts to take shape: Sleeping arrangements, kitchen size, and storage capacity all begin to revolve around that first decision.

And one thing becomes clear quickly: You can’t have everything. Even the longest Class B camper vans still have limited space.

Understanding Van Size Differences

Something that surprises a lot of people is how different van platforms affect layout options.

The three main vans we build in are:

Each one has slightly different dimensions.

For example:

  • The Sprinter 144 is one of the shortest vans in the category.
  • The Sprinter 170 is one of the longest.
  • The Transit 148 tends to fall somewhere in the middle but has the same wheel well placement. 

That wheel well and body length dramatically affects things like kitchen opportunity and living area size placement.

In some cases a Transit 148 regular can fit a two-module kitchen, while the comparable Sprinter 144 can fit a one-and-a-half module kitchen. Small dimensional differences can have big layout consequences.

Think in Zones

One of the easiest ways to conceptualize a van layout is by dividing the van into three zones:

1. Seating Zone

This is where people gather, eat, work, and relax.

For example:

A second-row bench seat paired with a Lagun articulating table mount can create a surprisingly large and flexible workspace. Check this video out of a Second Row seat we installed with our Lagun specialty mount.

By mounting the table to the seat frame rather than the wall, you can run a much larger tabletop without interfering with movement through the van. This gives both the passenger and driver the ability to use a table.

2. Kitchen Zone

The kitchen is usually the most debated part of a van build. Some people want a full galley with water systems, large counters, and refrigeration. Others want something much simpler.

Our most common kitchen options include:

Driver Side Kitchen Cabinet

Passenger Side Kitchen Cabinet

One of my favorite design tools is combining a kitchen with the Fu-Kit Bed System.

The front panel of the bed can flip up, allowing the countertop to extend underneath it. This creates a much larger workspace without permanently occupying floor space

A compact passenger-side kitchen cabinet with a flip-down table can also expand the living area dramatically, especially when paired with an awning like the Fiamma F45S.

3. Sleeping Zone

There are three common approaches to sleeping in vans:

Dinette beds 
Convert seating into a sleeping platform.

Elevated platform beds
Often with a garage underneath.

Hanging beds
Perfect for a bunk or bringing a motorcycle.

At Roost we commonly use our Fu-Kit Bed System or Strap-Up Bed System

The Strap-Up system is especially useful when you want sleeping space without permanently dedicating floor space to a bed.

You can sleep four people in a van while still keeping the living area usable during the day.

Storage and Garage Space

Garage space underneath the bed is often where large gear lives:

  • Bikes
  • Skis
  • Surfboards
  • Storage bins

Many people initially request sliding trays, but in practice we’ve found they’re not always necessary.

With a flip-up kit installed on our FU-Kit bed system, you can often access the entire garage area simply by lifting the bed panel.

This avoids the weight, cost, and complexity of large sliding trays.

Power Systems: Simplicity vs Complexity

Power systems are another area where simplicity can go a long way.

Traditional custom electrical systems involve:

  • Battery banks
  • Inverters
  • Solar controllers
  • Multiple electrical components
  • And a lot of crimped connections

A much simpler option we are using is portable power stations.

We commonly use:

Goal Zero power stations and the expandable EcoFlow Delta 3 Max Plus

These integrate:

  • Lithium batteries
  • Inverter
  • Charging: ‘Shore’, solar charging, and engine
  • Power management
  • A powerful 12v DC supply

All in one compact unit.

They can deliver roughly the equivalent of a 400Ah system in a much smaller footprint. You can read our deep thoughts on power blog for more information.

Design Tools That Help Layout

Beyond physical layout, we also use a few design tools when working with customers.

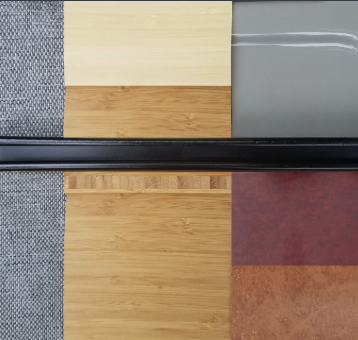
Mood Boards

A van can get visually busy very quickly. 

Between flooring, cabinetry, wall panels, upholstery, and hardware there are a lot of materials involved.

Creating a simple mood board helps determine:

  • How much bamboo paneling to show
  • Flooring styles
  • Color palettes
  • Fabric combinations

It helps keep the final design cohesive. 

Inset Panels

Inset wall panels are another useful design trick.

They can add 4–8 inches of usable interior width, which can be the difference between sleeping sideways or lengthwise.

And, this can eliminate the need for expensive external flares.

Different Layout Types

Over the years we’ve seen four main layout categories emerge.

Short Van With Multi-Seating

Best for families.

Often includes:

  • Second-row bench
  • Dinette
  • Strap-Up Bed
  • Compact kitchen

These builds prioritize seating and flexibility.

Long Van With Multi-Seating

The extra length allows:

  • Larger kitchens
  • Bigger garages
  • More storage
  • Dedicated workspaces

Families and adventure sports users often prefer this format.

Short Couple Vans

These are some of the most efficient layouts.

With no second-row seats, you gain space for:

  • Larger kitchens
  • Bigger benches
  • More cabinetry

Long Couple Vans

This is where layouts start to feel more like small apartments.

With a longer van body you can include:

  • Large dinettes and… 
  • Multiple lounging areas
  • Expanded kitchens
  • Dedicated workspaces

These builds are excellent for people living or working on the road.

The Biggest Layout Lesson

After designing hundreds of vans, the biggest takeaway is this:

Good layouts are intentional.

Trying to fit every possible feature into a van rarely works.

Instead, the best vans come from understanding how many people travel in the van; What activities the van supports; And how often those activities happen. From there, the design becomes much clearer.

Thinking About Your Own Van Layout?

If you’re planning a build and want help thinking through layout options, we’d love to help. Start with our products and build ecosystem here.

Smooth Rail Mounting System

Our modular mounting platform allows cabinetry, beds, and other components to be installed, removed, and reconfigured as your needs evolve.

Because your van should grow with your adventures, not limit them.

Watch the Full Planning Webinar

If you want to go deeper into this topic—including real van layout examples—we recently hosted a full webinar walking through dozens of builds and layout strategies.

You can watch the full presentation here: 

Deep Thoughts: On Power in Vans

Alright, let’s talk about power.

We’re going to be going over our Power Panel Ecosystem. Whether you’re getting the DIY kit or one of the kits we install here at Roost Vans, the core idea is the same: bring all your wiring into one central spot so you can control how power gets distributed throughout your van.

Think of Your Battery as a Cup

Let me break it down. Imagine your battery as a cup of water. That’s your power capacity. Filling that cup? That’s your recharge. Draining the cup, those are your power loads. And the size of the cup, that’s the size of your battery.

You typically have three recharge sources:

  • The Sun (solar)
  • Your Engine (while you’re driving)
  • Shore Power (when you’re plugged in)

Of those, your engine and shore power give you the biggest juice. Solar? Honestly, solar tends to be the third-best option. It’s restricted by clouds, roof space, and price per watt. And if you’ve got a vent fan or roof box up there, your solar footprint shrinks quick. 

But if you’re parking somewhere for five days and not driving? That’s when solar becomes your best friend. So it really depends on your trip style.

Power Needs: Big Draw vs. Small Draw

Here’s what I ask clients:

  1. What are you powering?
  2. How are you recharging it?

If you’re running big power draws, like an A/C unit, induction cooktop, hair dryer, or even a blender, we’ve got to plan around that. Even your fridge, which seems simple, is a constant draw making it important to get a quality fridge.

So, increase the battery size, or make sure it’s getting refilled. Often times it’s the Air Conditioner that is the big culprit. And in order to really accommodate that sufficiently. You are likely looking to invest about $10k to $15k apples to apples, specifically for the ability to power an Air Conditioner off grid for 8-12 hours. So, we suggest to our typical customers to wire the Air Conditioner in a way that it can be powered off of shore power. Then, if you know you are going somewhere hot, find a campground to plug into or bring a quiet Honda generator with you.

Smaller draws include:

  • LED lighting
  • Vent fan
  • Heater (that uses a fuel tap)
  • Water pump
  • Laptop

Most folks fall into that smaller-draw category. Very few actually need the big battery setups they think they do.

Personally, I like a 200 amp-hour battery (~2400 watts). It’s the sweet spot in the camper van, out for a couple days use case. It’s just enough capacity, can recharge from the engine, shore power, and solar if needed. Add a couple of solar panels, and you’re looking at a solid 3-day or longer camping rig for most people.

Also worth noting: most of us are parking in the shade. So again, solar might not pull the weight you want unless you’re strategic.

The Power Panel Kit: What It Is

Let’s look at the actual Power Panel Kit:

  • Power Panel itself which contains:
    • Distribution block to powers 12V systems (lights, fans, etc.)
    • Inputs for shore power, solar, and engine power
    • Connections for the Roost EZ Connect Cable
    • Jumper Cable
  • Switch Plate (on a 6ft leads from the Power Panel)
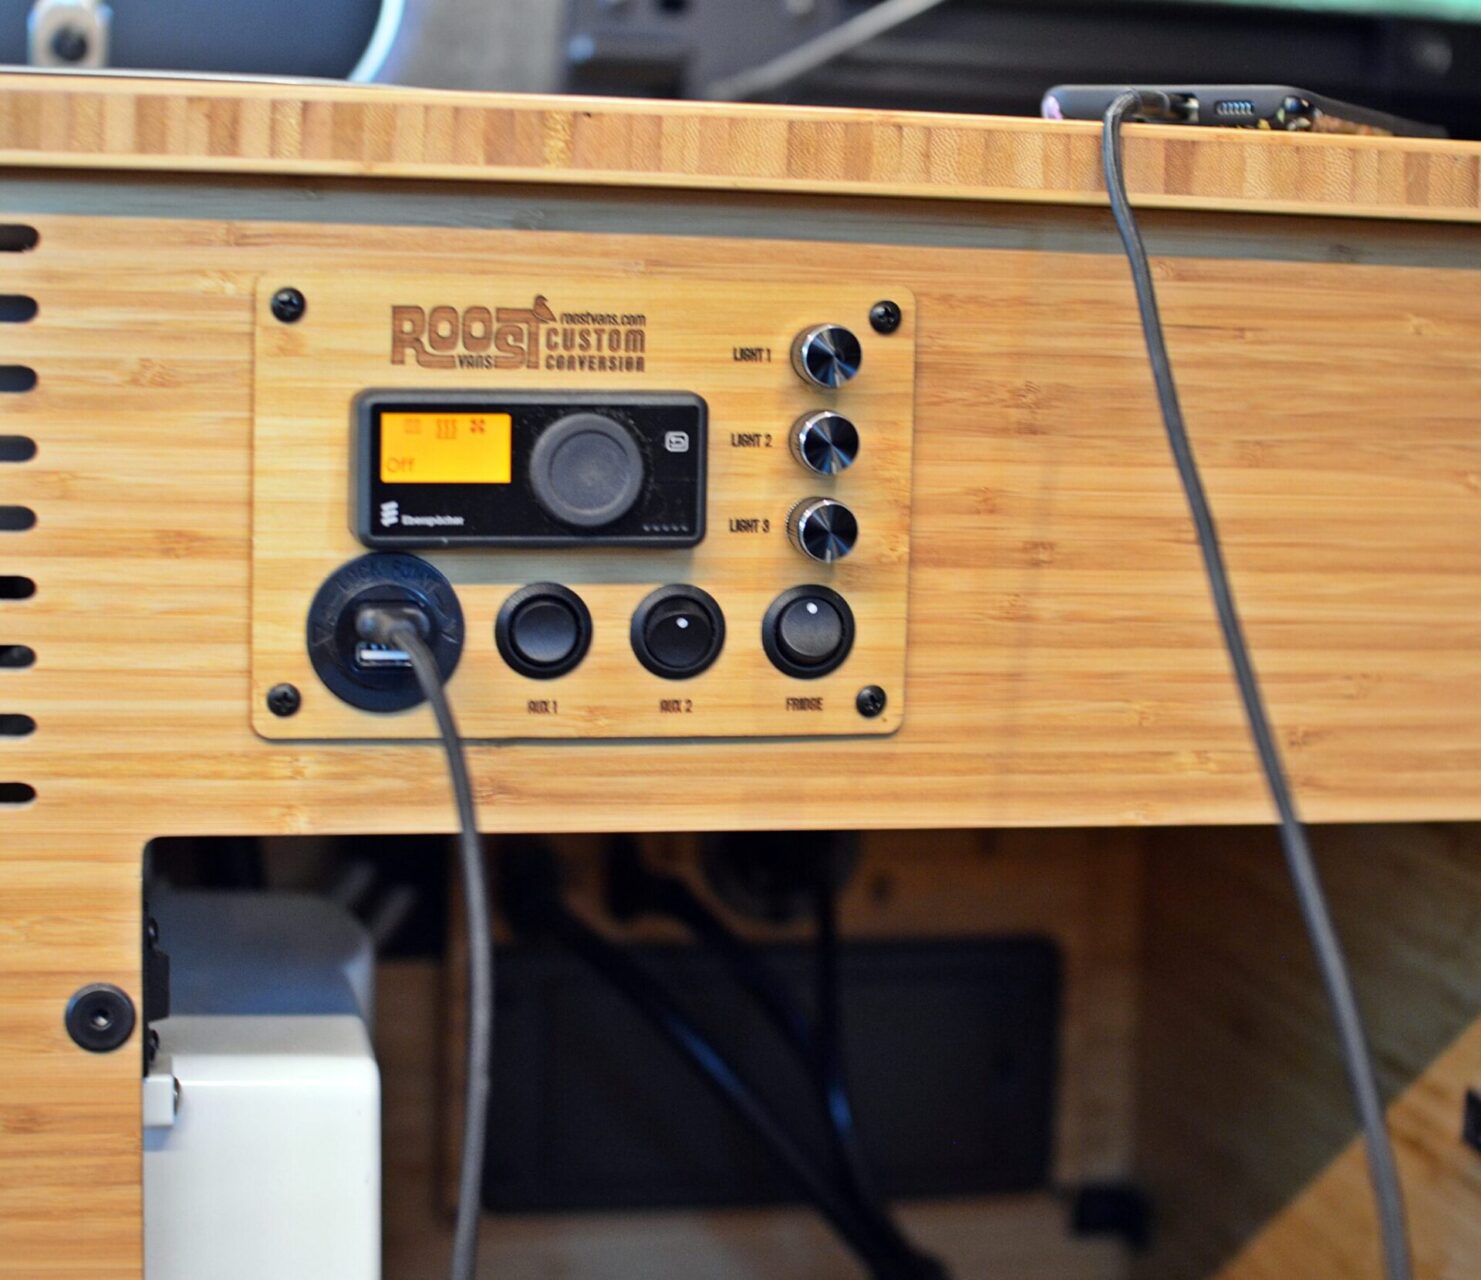
    • 3 light dimmers
    • 3 auxiliary switches
    • DC outlet with dual USB port insert
    • Location for Espar Easy Start Pro thermostat placement (not included)

The Jumper Cable allows you to power your loads straight from your engine battery if you remove your power station. Say you take it inside for charging? No problem. Just don’t forget to turn your lights off unless you want a dead starter.

Accessories Available:

  • Highly Recommended > Charge Lines and Installation Kit: all your lines (solar, shore, ground, engine), ties, protectors, sleeves, sealants, and clips
  • Goal Zero EZ Connect wiring harness (for the X-series). Our first choice
  • Bare End EZ Connect wiring harness that connects your choice of power station ↔ power station. You will need to crimp and engineer this yourself
  • AC Outlet Extension (household power extension)

We tried to think of everything so your install goes smooth.

Real-World Install Example

We dropped a Goal Zero 1000X in a cabinet with the link module and the easy-connect harness. You can see the power panel snugged right against the wall, clean and tight. From there, you bring in all your loads (lights, fans, etc.) to the distribution block on the power panel.

And when you’re ready for cabinetry, you can mount the switch panel to the front, passenger side, driver side, wherever works best. That’s the flexibility we built in.

Plus, there’s a 120V inlet option as part of our AC Outlet Extension Accessory that can be wired in the wall. You can plug an extension cord from your inverter into that inlet, which feeds power through to another outlet you can install in the van. Don’t need it? No problem. But if you want it, it’s a readily available accessory.

A Clean Solution for Real Life

In one of our recent builds, we installed the power panel behind a Goal Zero 6000X. All the wiring and switches are right there. Want dimmable lighting? Easy. Want to hide the main panel but have access for maintenance? Done.

We use a cigarette-style plug for USB-B/C or whatever the current tech is. That’s by design. Technology changes, and we want you to be able to pull the USB plug and upgrade without a total overhaul.

Final Thoughts

The Power Panel Ecosystem is built to simplify van wiring. You still have some work involved, this isn’t magic. But the lions share is done. It pulls everything into one spot, gives you switch control, and offers a clean, expandable, and future-proof way to handle power in your van.

And, it’s available now on our website.

Roost Vans in 2025: Where We’re Headed Next

2025 was a year of building: products, vans, and momentum.

We’ve always believed that good van design isn’t about trends or cramming RV features into a metal box. It’s about building systems that work, last, and adapt to how people actually use their vans. This past year pushed that philosophy further than ever.

2025 Was a Big Year for Products

Some people may view us as van builders (which we are good at), but the truth is, Roost Vans is a product company first.

One of the biggest milestones this year was officially releasing our DIY Paneling Kits for online purchase. 

Paneling has always been one of the most time-consuming and intimidating parts of a van build. Our goal was to create a paneling system that installs quickly and integrates seamlessly with our Smooth Rail Mounting System.

By building paneling around a rail-based system… not fighting against it… we gave DIY builders the flexibility the industry hasn’t offered before. Need to service wiring later? Swap layouts? Add components down the road? That’s the point.

Deep Thoughts

This year we also leaned heavily into long-form education, what we internally refer to as Deep Thoughts with Dennis.

We published blogs covering topics the van industry often overcomplicates or avoids altogether, including:

These weren’t product pitches. They were honest (hot) takes rooted in real-world use, family travel, and years of building vans that actually get used.

The consistent theme across all of them?
Simple systems age better than complex ones.

If you want to go deep, you can find all of those blogs on our site, and yes, more are coming.

Vans Built

Our Clackamas, Oregon shop stayed busy all year.

We built dozens of Sprinter and Transit vans, while we continued to dial in our modular approach. Every in-shop build informs our products, and every product improves future builds.

We also got out into the community, attending three trade shows with Adventure Van Expo. Talking face-to-face with customers, DIY builders, and fellow industry folks continues to be one of the most valuable feedback loops we have.

Videos

In 2025, we released 25 YouTube videos, pulling back the curtain on how we think about van design and what makes our van builds so unique. We don’t believe in polished hype videos. We believe in showing the work, because modular systems only matter if they make sense in practice. That mindset will carry us (and van DIY-ers) forward.

Looking Ahead to 2026

2026 is shaping up to be a growth year!

Here’s what we’re focused on:

More Products (Including the Transit MidRoof Ecosystem and Flooring)

We’ll be releasing additional DIY products through the website, including our flooring system, designed with the same serviceable mindset as everything else we build.

More Education & Content

More YouTube, blogs, and real-world explanations of what works, what doesn’t, and why.

Streamlining and a Bigger Shop

As demand grows, we’re exploring moving into a larger shop so we can:

  • Take on more in-shop builds
  • Increase production capacity
  • Continue supporting DIY builders with well-tested products

Setting a New Standard

The van industry has relied on L-track for a long time. There’s a better way.

Our Smooth Rail Mounting System allows mounting anywhere, anytime, without being locked into predetermined track locations. Reliability and flexibility shouldn’t be optional, and we’re committed to pushing our Mounting System toward becoming an industry standard. Something we will continue to push for in 2026.

If you want to learn more about our Smooth Rail Mounting System, or any of our ecosystem products, you can visit us at a trade show this year with adventurevanexpo.com in Hood River, OR and Enumclaw, WA. But you can always reach out to us anytime at sales@roosvans.com

Thanks for Being Part of the Journey

Whether you followed along through blogs, watched videos, bought products, or trusted us with your van build, thank you.

We’re just getting started.

Learn more about our DIY products and in-shop builds on all our socials:

Deep Thoughts on Air Conditioners in Vans

When it comes to camper vans, air conditioning is a hot topic (pun intended). While vans are designed for adventure, we can’t ignore the reality of rising temperatures, especially in humid regions like the South. Here’s a practical look at air conditioning options in vans, balancing comfort, cost, and practicality.

Air Conditioners: Energy Hogs with Big Demands

Air conditioners are notorious for consuming significant energy. Running one autonomously requires a hefty battery system, typically 600-800 amp hours, which can cost upwards of $10,000-$15,000. Even with this investment, you’re looking at a maximum run time of about 8 hours on a full charge. That’s fine for an evening but leaves you with a dead battery by morning.

The Practical Approach

For many customers, we recommend a more budget-friendly and practical solution:

  • Portable Power Stations: A portable power station can run an air conditioner for 1-2 hours, perfect for quick stops like grocery runs or keeping pets cool.
  • Shore Power: When planning a trip, consider campgrounds or locations with electrical hookups. This allows you to run your air conditioner continuously without worrying about battery limits.

Alternatives to Air Conditioning

Most van travelers head for cooler climates or plan activities during the heat of the day, making air conditioning less critical. By choosing destinations with higher elevations, proximity to water, or better airflow, you can often avoid the need for constant cooling. At night, temperatures often drop enough to make sleeping comfortable without AC.

For those who still want air conditioning without a large battery system, we often wire AC units to operate exclusively on shore power. This setup keeps costs low and allows you to plug into outlets at campgrounds, driveways, or other powered locations.

Some vans, like passenger Sprinters, come with secondary air conditioners for the rear compartment. However, these only work when the engine is running. While it’s an option for brief cooling, it’s not a sustainable or practical solution for most camping scenarios. These factory AC options also tend to make the build process exceptionally challenging.

Ventilation is often a more practical and cost-effective solution for cooling and moisture control in vans. In a future blog, we’ll dive into the importance of vent fans and point-of-use fans as alternatives to air conditioning. For now, know that a well-placed vent fan and smart planning can go a long way in creating a comfortable van environment.

At Roost Vans, we’re all about providing practical solutions tailored to your needs and budget. Whether you’re considering air conditioning or exploring other options, we’re here to help you create the perfect setup for your van life adventures.

A Camper Van, Not an RV

It’s important to remember that camper vans are built for versatility and adventure, not for mimicking an RV’s luxury. Roost Vans caters to adventurous individuals who use their vans as a home base for exploring. Our approach focuses on functionality and practicality while keeping costs reasonable.

Need help with your van build?
Visit us at roostvans.com to learn more!