Deep Thoughts on Air Conditioners in Vans

When it comes to camper vans, air conditioning is a hot topic (pun intended). While vans are designed for adventure, we can’t ignore the reality of rising temperatures, especially in humid regions like the South. Here’s a practical look at air conditioning options in vans, balancing comfort, cost, and practicality.

Air Conditioners: Energy Hogs with Big Demands

Air conditioners are notorious for consuming significant energy. Running one autonomously requires a hefty battery system, typically 600-800 amp hours, which can cost upwards of $10,000-$15,000. Even with this investment, you’re looking at a maximum run time of about 8 hours on a full charge. That’s fine for an evening but leaves you with a dead battery by morning.

The Practical Approach

For many customers, we recommend a more budget-friendly and practical solution:

  • Portable Power Stations: A portable power station can run an air conditioner for 1-2 hours, perfect for quick stops like grocery runs or keeping pets cool.
  • Shore Power: When planning a trip, consider campgrounds or locations with electrical hookups. This allows you to run your air conditioner continuously without worrying about battery limits.

Alternatives to Air Conditioning

Most van travelers head for cooler climates or plan activities during the heat of the day, making air conditioning less critical. By choosing destinations with higher elevations, proximity to water, or better airflow, you can often avoid the need for constant cooling. At night, temperatures often drop enough to make sleeping comfortable without AC.

For those who still want air conditioning without a large battery system, we often wire AC units to operate exclusively on shore power. This setup keeps costs low and allows you to plug into outlets at campgrounds, driveways, or other powered locations.

Some vans, like passenger Sprinters, come with secondary air conditioners for the rear compartment. However, these only work when the engine is running. While it’s an option for brief cooling, it’s not a sustainable or practical solution for most camping scenarios. These factory AC options also tend to make the build process exceptionally challenging.

Ventilation is often a more practical and cost-effective solution for cooling and moisture control in vans. In a future blog, we’ll dive into the importance of vent fans and point-of-use fans as alternatives to air conditioning. For now, know that a well-placed vent fan and smart planning can go a long way in creating a comfortable van environment.

At Roost Vans, we’re all about providing practical solutions tailored to your needs and budget. Whether you’re considering air conditioning or exploring other options, we’re here to help you create the perfect setup for your van life adventures.

A Camper Van, Not an RV

It’s important to remember that camper vans are built for versatility and adventure, not for mimicking an RV’s luxury. Roost Vans caters to adventurous individuals who use their vans as a home base for exploring. Our approach focuses on functionality and practicality while keeping costs reasonable.

Need help with your van build?
Visit us at roostvans.com to learn more!

Deep Thoughts on Toilets in Vans

Let’s face it: when nature calls, even the most adventurous of us need a practical solution. In the compact space of a camper van, toilets can be a tricky topic. At Roost Vans, we’ve spent plenty of time evaluating different options, weighing the pros and cons, and considering the needs of families on the road. Here’s our philosophy on handling “bathroom business” in a van, our toilet solution, and why simplicity always wins.

The Smell Factor: Keeping Your Van Fresh

The first hurdle with any toilet system is managing odors, especially in a confined space. Let’s be real: no matter how healthy your diet is, it’s not going to smell great. That’s why our approach focuses on minimizing smells while keeping the process simple and effective.

As parents, we understand the challenges of potty training, late-night bathroom runs, and the occasional emergency. Most of the time, van toilets are used for quick middle-of-the-night pee breaks or for helping kiddos who can’t make it to the nearest restroom. It’s rare that they’re needed for “the other business”—and when they are, we’ve got a plan for that too.

The Roost Solution: The Loo Bench

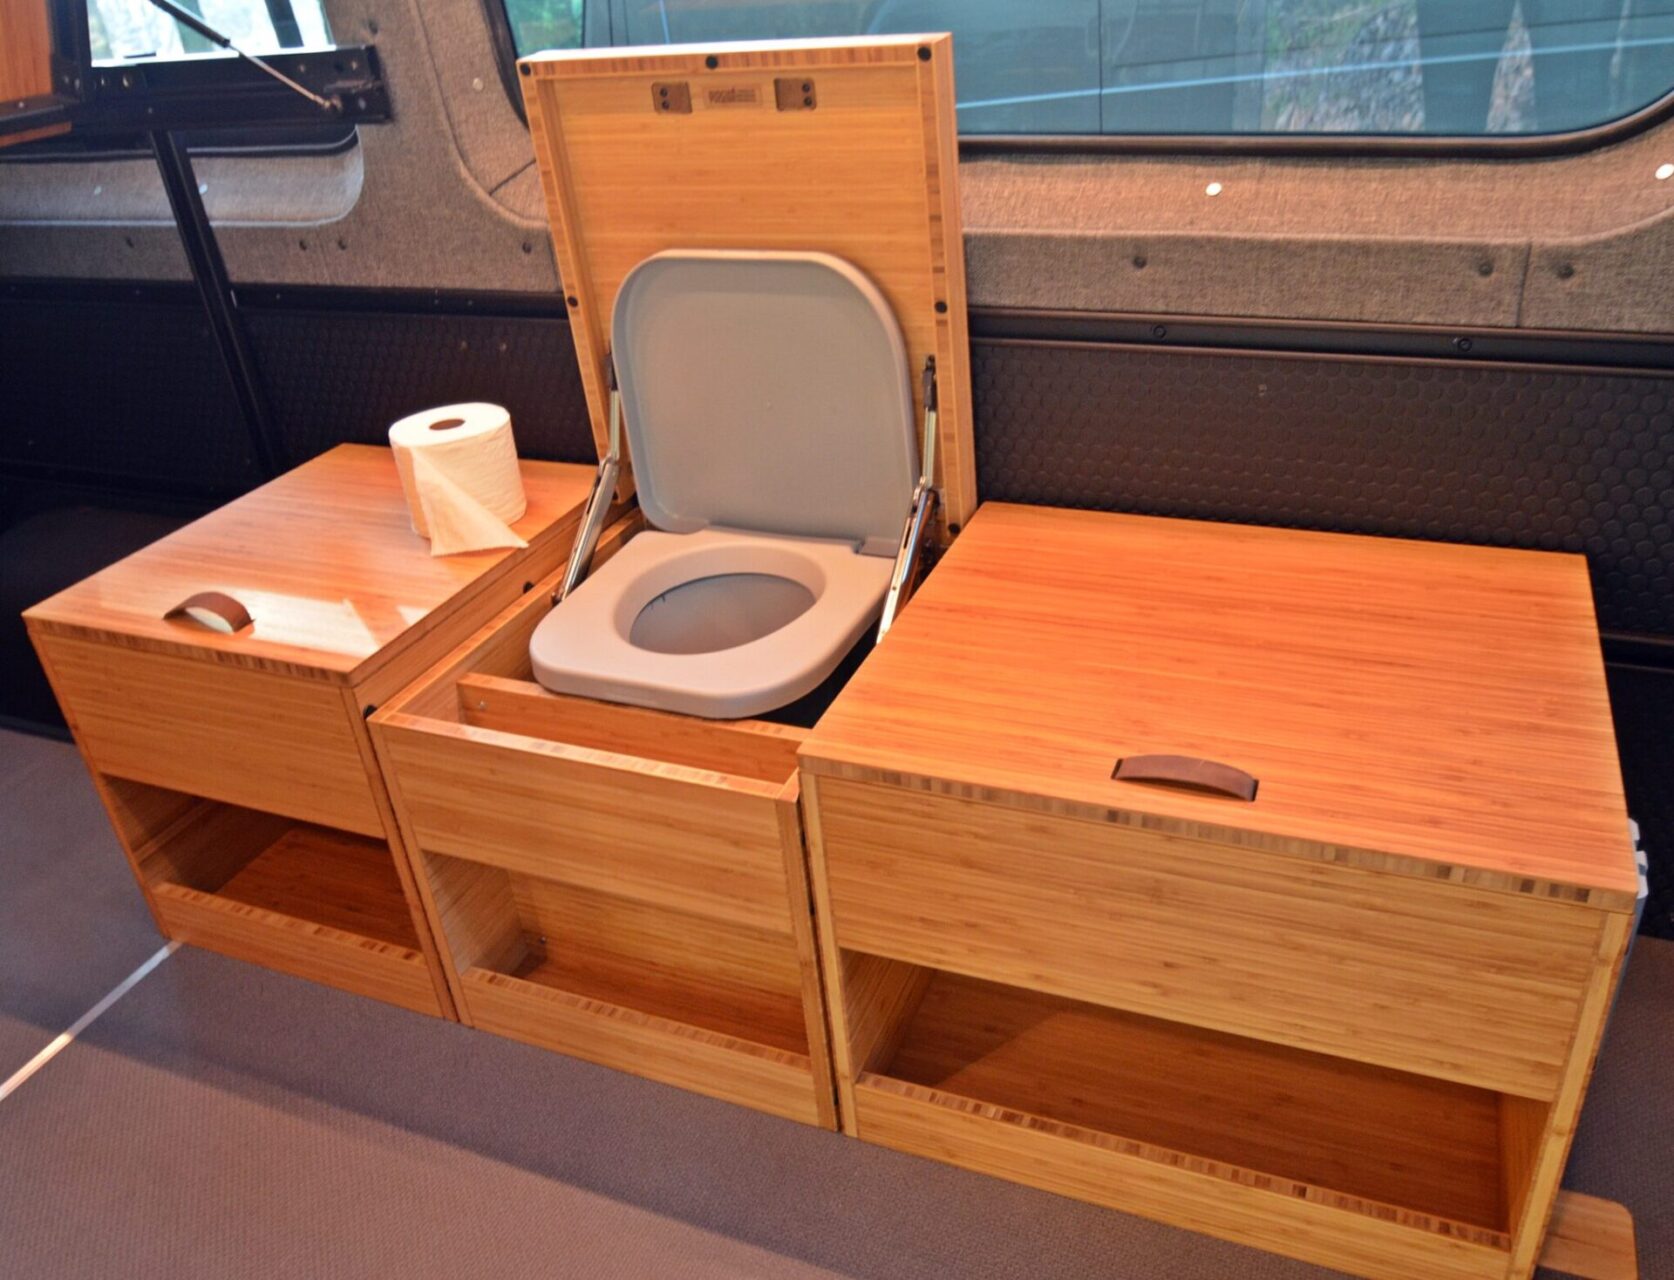
At Roost Vans, we’ve opted for a straightforward yet functional solution: the Stansport EasyGo Loo, paired with our custom-designed Loo Bench.

Why the EasyGo Loo?

  • Simplicity: No chemicals, no power requirements, and no complex ventilation systems.
  • Flexibility: Use it inside the van or easily remove it for outdoor use in a picturesque forest or secluded spot.
  • Ease of Cleaning: Empty it into a flushing toilet or bury the waste responsibly in the woods.

The Loo Bench: Discreet and Practical

The Loo Bench is more than just a storage solution—it’s a thoughtfully designed cabinet that keeps odors contained and the toilet out of sight when not in use.

  • Tight-Seal Design: The EasyGo Loo’s lid and the Loo Bench’s snug-fit spring-loaded top work together to lock in odors.
  • Extra Storage: Space for toilet paper, toiletries, and cleaning supplies ensures everything is in one place.
  • Invisible Convenience: When not in use, the Loo Bench blends seamlessly into your van’s interior.

Other Toilet Options: Why We Say “No Thanks”

We’ve evaluated a variety of toilet systems, including cassette toilets, composting toilets, and the Laveo (our nickname: the Diaper Genie). Here’s why they didn’t make the cut:

  • Cassette Toilets: Require chemicals and careful disposal. Not ideal for van lifers who prefer a simpler, less messy option.
  • Composting Toilets: Bulky, complex, and require constant power for ventilation. Plus, the fan system adds a continuous draw on your battery.
  • Laveo Toilets: While convenient, they involve sealing waste in disposable bags, contributing to landfills instead of returning waste to the earth.

By sticking to the chamber pot solution, we’ve kept things affordable, straightforward, and eco-friendly.


At Roost Vans, our design philosophy prioritizes usability and practicality. Complicated toilet systems with chemicals, power requirements, and extensive maintenance don’t align with our vision of van life. We believe your energy should go toward adventure, not troubleshooting bathroom systems.

A Quick Recap of Our Approach

  1. The EasyGo Loo: Simple, chemical-free, and portable.
  2. The Loo Bench: A discreet, odor-controlling cabinet with extra storage.
  3. Minimal Waste: Avoid landfills and unnecessary chemicals by flushing waste in a toilet or burying it responsibly.
  4. Keep It Simple: Avoid bulky, expensive systems that add complexity without delivering significant benefits.

When it comes to van life, less is often more. The Roost Vans approach to toilets is designed to provide what you need, when you need it, without overcomplicating things. Whether you’re potty training kids, handling a late-night emergency, or simply appreciating the freedom of life on the road, our system ensures you can focus on the journey—not the logistics.

Next time nature calls, you’ll be ready. Happy travels from all of us at Roost Vans!

Deep Thoughts on Paneling

Paneling a van used to be one of those jobs. You know, the kind where you’d spend three weekends swearing at plywood sheets, fighting with warped edges, and wondering why you ever thought van life sounded like a good idea. You’d start with a fresh cup of coffee and a YouTube tutorial, and five hours later you’d be covered in sawdust, muttering something about “living in a tent instead.”

Yeah… we’ve been there.

At Roost Vans, we decided to put an end to that madness. Paneling shouldn’t be a multi-day war with your walls. It should be clean, fast, and look really good when you’re done… Whether you’re a DIY builder on phase one of your build or wrapping up the finishing touches.

The Old Days of Paneling

Before products like our paneling kits, van builders were out here trying to bend and trim massive sheets of wood to fit every odd curve of their van. The measuring, the cutting, the inevitable “oops, I cut the wrong side” moment; it’s enough to break the spirit of even the most determined DIYer.

And serviceability? Forget about it. Once your panels were in, you prayed to the van gods that nothing behind them would ever break, because removing everything was like trying to solve a Rubik’s Cube.

We got tired of seeing people go through all that. So we fixed it.

The Roost Vans Paneling System: Lower, Mid, Upper

We’ve taken the pain and guesswork out of paneling with a modular paneling system that’s as simple as “open box, install, smile.” Well, it doesn’t install itself, but it sure is a ton easier that starting from scratch. Our paneling kits pair seamlessly with our Smooth Rail Mounting System and the best part? They’re not trapped behind the mounting system. You can pop off a single panel for access without tearing apart your entire van allowing for future serviceability behind the panel.

Upper Paneling Kit

The upper kit is pre-cut and ready to drop in. Install it using the Smooth Rail Mounting System, and you’ll have easy ceiling access anytime. Just unscrew a few thread-forming screws and pop it down.

Options? We’ve got finished bamboo sealed with Osmo hard wax, unfinished bamboo for your custom finish, or fabric wrap.

Mid Wall Paneling Kit

The mid kit, shown in our gray heather fabric wrap, but you can also grab it in finished or unfinished bamboo.

Inset bamboo window panels make side-to-side sleeping possible, even if you’re six feet tall and not using flares. No more hitting your elbows on cold metal.

Lower Paneling Kit

Available in anti-skid hex-ply, finished bamboo, unfinished bamboo, or fabric-wrapped options for a softer look.

And here’s the kicker: we’ve installed this kit in nearly 100 vans now, and it just works. It’s clean, durable, and easy to service. Most importantly, it makes your van feel done.

Why DIYers Love It

We designed these kits for builders who want a professional look without sacrificing weekends to tedious cutting and guesswork. You can start your build with paneling in place and still make changes later, no redoing your work.

Want to add wiring later? No problem. Need to get behind a panel? Pop it off and go.

It’s the perfect blend of flexibility and finish, and it’s why our paneling has become one of our best-selling systems.

Why We Did It

Because we were sick of seeing people suffer.

Paneling your van shouldn’t feel like a rite of passage that leaves you traumatized and half bald from stress. We wanted to make it so that DIYers (and shop builds) can get fast, clean installs with zero guesswork.

Ready to Panel Like a Pro?

If you’re ready to stop fighting with plywood and start building your dream van, check out our full lineup of Paneling Kits.

Or watch our full DIY paneling breakdown video on YouTube for a closer look at the Lower, Mid, and Upper kits in action.

Deep Thoughts on Fans in Camper Vans

When building a camper van, proper ventilation and airflow are crucial for comfort, moisture control, and even safety. While air conditioners are often considered a necessity, vent fans and point-of-use fans are game-changers for maintaining a comfortable environment without the hefty cost or energy consumption of an air conditioner. Here’s an in-depth look at why these fans are essential for any camper van build.

Vent Fans: The Backbone of Van Ventilation

A high-quality vent fan, like the MaxxAir fan we frequently use, is one of the most important additions to any van. Here’s why:


Key Benefits of a Vent Fan

  1. Rain-Resistant Operation: The MaxxAir fan can run even during rain, ensuring constant airflow regardless of weather conditions.
  2. Driving-Friendly Design: The fan can remain open and operational while driving, making it ideal for long road trips.
  3. Effective Airflow: A single vent fan can move a significant amount of air, enough to create a steady breeze through the van.
  4. Quiet: sturdy and robust, these fans have held up time and time again.

The placement of your vent fan depends on how you use your van:

  • Front Placement: Ideal for cooking areas, a front-mounted vent fan can quickly exhaust food smells and steam. Pair it with bed windows and screened vents for cross-ventilation.
  • Rear Placement: Less common and less effective, rear-mounted fans don’t work well for direct breeze while sleeping due to the screen diffusing the air, but they do still pull air from outside for cross ventilation.
  • Either way: Roost Vans has a bamboo trim ring to dress it up – available for purchase on our website.

Vent fans aren’t just for warm-weather trips. In colder environments, they are essential for managing moisture. Did you know a single person exhales about a liter of moisture overnight? Multiply that by the number of people in the van, and you have a recipe for condensation and mildew.

Here’s a proven strategy for moisture control:

  • Set the vent fan to its lowest setting, pointed outward.
  • Use a heater to maintain warmth.

This combination ensures your van stays cozy and dry, preventing condensation buildup while keeping you warm all night long.

Point-of-Use Fans: A Targeted Cooling Solution

For those looking for a more focused airflow, point-of-use fans are an excellent complement to a vent fan. These fans are smaller, portable, and incredibly energy-efficient.

Why Point-of-Use Fans?

  1. Direct Cooling: Perfect for hot nights, these fans provide a gentle, localized breeze to keep you cool without the noise of a vent fan at full speed.
  2. Energy Efficiency: Designed to consume minimal power, they are ideal for off-grid campers who want to conserve battery life.
  3. Customizable Settings: Many models include multiple speed options, a timer, and adjustable angles, allowing you to direct airflow exactly where you need it.


Point-of-Use Fans vs. Vent Fans

While vent fans are great for overall air circulation and moisture control, point-of-use fans excel at personal cooling. For instance:

  • Vent fans work well for pulling hot air out of the van or managing smells.
  • Point-of-use fans are ideal for creating a light breeze while sleeping or relaxing.

For the best results, combine a vent fan with windows that open and point-of-use fans. This setup allows you to:

  • Exhaust hot air while drawing in cooler air.
  • Use cross-ventilation for better airflow.
  • Direct cooling air exactly where you need it without relying on noisy or energy-intensive solutions.

The Budget-Friendly Alternative to Air Conditioning

If an air conditioner isn’t in your budget, this combination can keep you surprisingly comfortable, even in warmer climates. At trade shows in 100°F+ weather, our team has relied on vent fans and point-of-use fans to stay cool at night. By pairing the two, you can create a pleasant sleeping environment without the expense of an air conditioner.

2 Fans or 1?

These fans move so much air that 2 fans is a bit overkill. That in combination with eliminating a lot of roof real estate, adding cost, and just being a bit unnecessary makes 1 fan over 2 a no brainer. Sometimes there is an argument of one blowing in and one blowing out, our answer to that is put that money into a vented window as the vent fan moves so much air, a second is unnecessary. Granted, if your are transporting 10 dogs in your van, maybe a 2nd fan is desirable.

Key Takeaways

  1. Vent fans are a must-have for effective airflow, moisture control, and overall ventilation in your van.
  2. Point-of-use fans provide direct cooling and are perfect for those who prefer a targeted breeze.
  3. Together, they offer an affordable, energy-efficient solution for staying comfortable on the road.

At Roost Vans, we believe in practical, effective solutions for every van build. A well-placed vent fan and a quality point-of-use fan can transform your van into a comfortable, livable space no matter where your adventures take you.

Ready to upgrade your van’s ventilation? Contact us or visit roostvans.com to learn more about our products and services!

Deep Thoughts on Windows

Windows might seem like a straightforward addition to your camper van, but their placement, type, and style can dramatically impact your van’s functionality, comfort, and aesthetic. At Roost Vans, we’re strong proponents of thoughtful window installation, prioritizing practicality, visual appeal, and overall usability. Here’s our deep dive into why windows matter, the best options available, and how to make the right decisions for your van.

Why We Recommend Windows All Around

Installing windows all around your van enhances your experience in several key ways:

    1. Bringing the Outside In
      Most van lifers venture out to explore beautiful landscapes. Without windows, you’re stuck in a cave, missing out on the views that inspired your journey in the first place. With full-size windows, you can enjoy nature even when the weather forces you indoors.
    2. Natural Light
      Windows flood your van with natural light, making the space feel larger and more inviting.
    3. Ventilation
      Windows with sliding screens or awning mechanisms allow for airflow, keeping the interior fresh and comfortable. This is especially crucial in cooking or sleeping areas.
    4. Driving Safety
      Windows in key locations, such as rear doors and side panels, improve visibility while driving, backing up, and navigating tight spaces. Even with advanced cameras, analog visibility boosts confidence on the road.
    5. Reduced Interior Trim Costs
      Installing windows eliminates the need for custom trim pieces to cover window pockets, saving time and money.
    6. Window Covers
      You can always get insulated covers to provide insulation and privacy

Types of Windows

At Roost Vans, we only install glue-in windows, avoiding clamp-in styles due to their lack of reliability. Here’s a breakdown of the types we recommend:

  1. AM Auto Sliding Screen Windows
    • Robust and durable.
    • Fully functional sliding screens.
    • Can be driven with the window open.
  2. Awning-Style Windows
    • Ideal for bunk or pill windows.
    • Excellent for ventilation, even in heavy rain.
    • Not recommended for full-size windows due to their limited functionality while driving.

Privacy and Insulation

We understand concerns about privacy, especially for those spending nights in urban areas. During the day, most windows with factory or aftermarket tint provide adequate privacy. However, at night, interior lighting can make your van visible from the outside.

For privacy and insulation, we recommend:

  • VanEssential reliable, quality options that we’ve tested extensively.
  • VanMade Gear Window Covers: Made in Portland Oregon, these covers are made to order out of the highest quality materials with exceptional design features

Key Questions to Consider

  1. How will you use your van?
    If you plan to camp in scenic locations, windows all around are a must for enjoying the views.
  2. Do you need ventilation?
    Sliding or awning windows in key areas, such as the kitchen or sleeping quarters, can make a significant difference.
  3. What about privacy?
    If urban camping is part of your plan, consider tinted windows paired with high-quality window covers for maximum privacy.
  4. How much driving visibility do you need?
    Rear and side windows greatly enhance your confidence when maneuvering in tight spaces or busy parking lots.

The Roost Vans Difference

At Roost Vans, we prioritize quality, reliability, and usability. That’s why we:

  • Only install glue-in windows for their superior durability.
  • Avoid clamp-in styles, which are prone to leaking and issues over time.
  • Partner with trusted brands like AM Auto for sliding-screen windows and other high-quality options.

Windows are more than a design choice—they’re a practical addition that enhances your van’s functionality, comfort, and overall experience. Whether you’re enjoying a mountain vista, cooking up dinner, or navigating a tight parking lot, the right windows make all the difference.

At Roost Vans, we’re here to help you select and install the perfect windows for your build. Contact us or visit roostvans.com to learn more about our van build services and window options. Let’s bring the outside in and make your van life brighter!

Deep Thoughts on Galley Width

When it comes to van layouts, one of the most critical design choices you’ll make is the galley width. At Roost Vans, we’ve spent countless hours fine-tuning our approach to ensure you get the perfect balance between functionality, storage, and the feeling of open space. Whether you’re a weekend warrior or a full-time van lifer, creating an efficient, comfortable galley area is essential to your van experience. Here’s how we’ve tackled this design challenge with our modular cabinetry ecosystem.

Why Galley Width Matters

The galley, or kitchen area, is often the heart of a camper van. It’s where meals are prepped, gear is stored, and essentials are kept within arm’s reach. However, vans come with a limited amount of width, and making the wrong choices here can leave you feeling cramped and claustrophobic.

At Roost Vans, we’ve prioritized maximizing usable space while maintaining a sense of openness. Every inch matters, and our cabinetry is designed to provide plenty of storage without crowding the interior of your van.

Design Philosophy

One of our guiding principles is to avoid that “tight cave” feeling. We achieve this by:

  • Keeping cabinetry dimensions optimized for functionality without overwhelming the interior.
  • Offering standard-depth cabinets (20 inches) and compact-depth cabinets (16 inches) to meet your unique needs.
  • Designing upper cabinets and shelving that provide storage while maintaining a clear visual line through the van to make the space feel larger.

Key Galley Products in the Roost Ecosystem


Standard Passenger Kitchen Cabinet

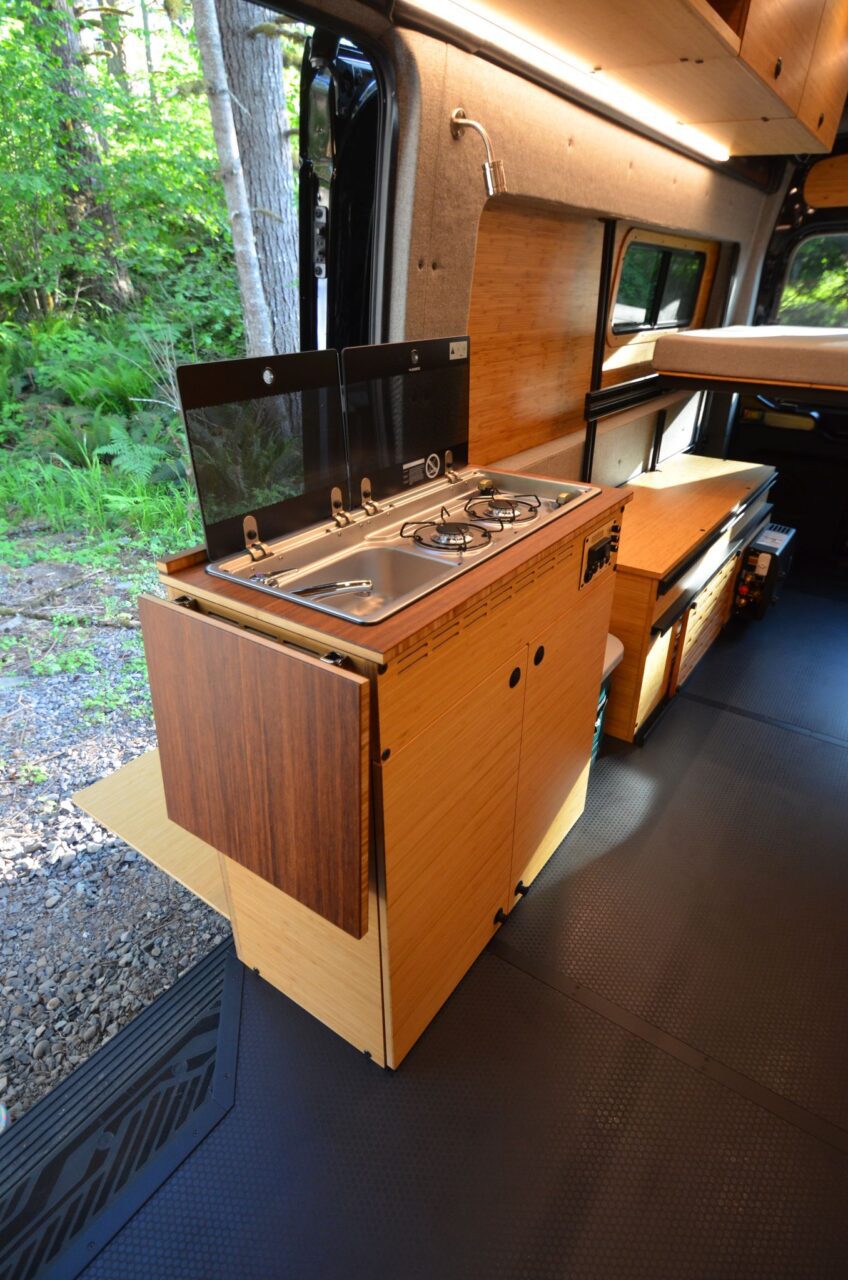
This versatile cabinet has been a staple of our lineup. Designed for installation in your van’s passenger-side doorway, it features:

  • A robust, pull-down table that’s adjustable for angled parking situations.
  • Space to install a full-size drawer fridge, accessible from both inside and outside the van.
  • Multiple storage shelves and room for a Dometic sink-and-stove combo, making it a complete kitchen solution.

Compact Passenger Kitchen Cabinet

Installed in our shop and not yet DIY (Jan 2025). For those who want to save on galley depth, our compact version of the passenger kitchen cabinet is just 16 inches deep. This slimmer design:

  • Saves space while still allowing for essential features, like a two-burner sink combo.
  • Accommodates power stations and additional shelving for flexible storage.

Perfect for builds where maximizing aisle width is a top priority.

Fridge Module

Need more flexibility for refrigeration? Our fridge module lets you:

  • Install a full-height fridge or a shorter fridge with space above for a sink or additional storage.
  • Pair it seamlessly with our drawer or sink cabinet for a unified look and uninterrupted countertop.

Bench Cabinets

Our bench cabinets are multipurpose heroes, available in multiple sizes:

  • Loo Bench: Houses a chamber pot and provides extra storage for toiletries, with a cushion top for seating.
  • Storage Benches (18″, 24″, and 36″ options): These are ideal for keeping gear organized without sacrificing space.
  • Power Station Box: Installed in our shop and not yet DIY (Jan 2025). Ventilated storage for your power station, with the option to add a bench cushion for dual-purpose functionality. 

Upper Cabinets and Shelving

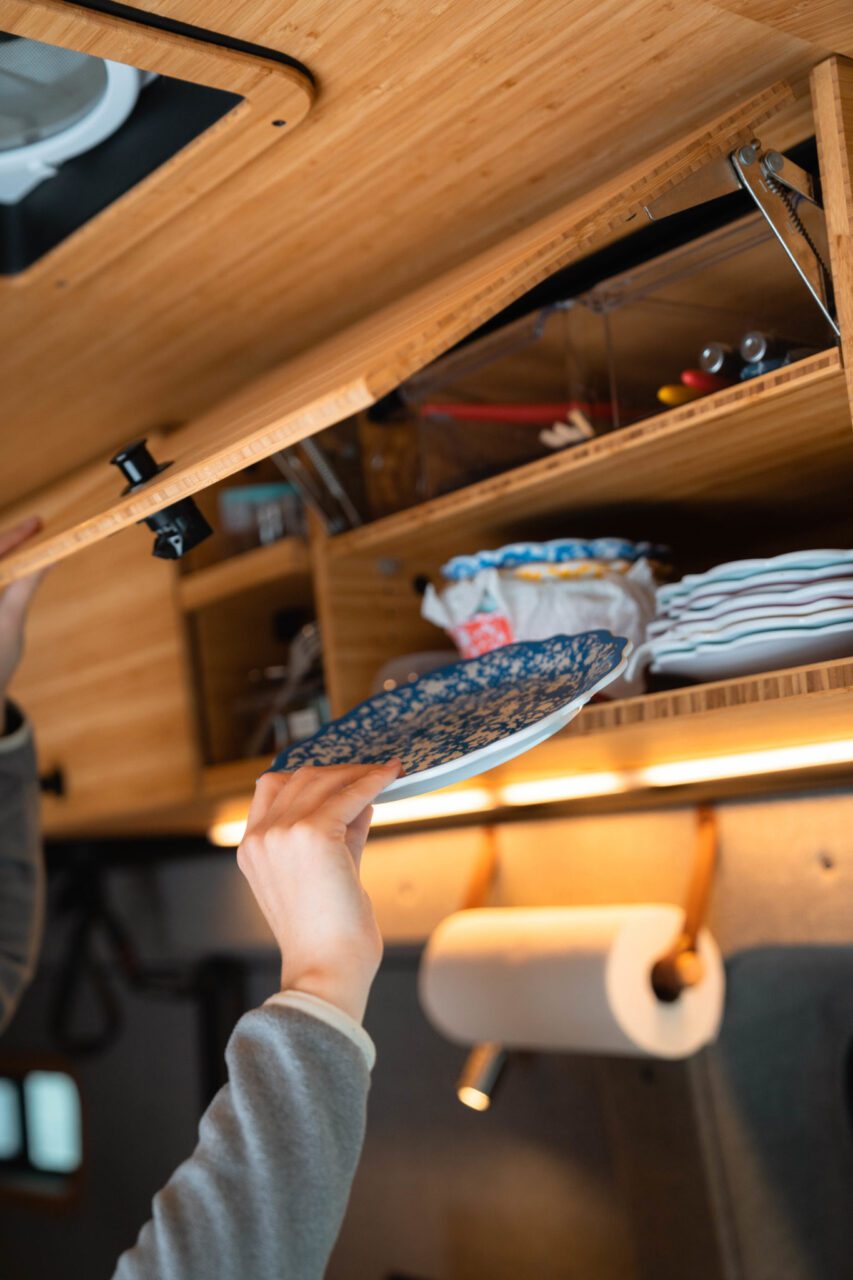
Our overhead cabinetry and shelving systems are designed to keep your van organized while maintaining an open feel:

  • Adjustable shelves allow you to customize storage.
  • The mid-shelf kit can act as a standalone shelf, an in-shelf, or a connecting shelf between upper cabinets.
  • For even more flexibility, we also support soft overhead cabinets, like those from VanEssential, with a custom bracket kit for easy installation.

The Importance of Fridge and Sink Placement

We carefully consider appliance placement to optimize galley width. Full-size fridges, sink-and-stove combos, and other components are positioned to:

  • Provide easy access without crowding the walkway.
  • Maximize countertop space for meal prep and daily tasks.
  • Leave room for additional modular components, such as our drawer cabinets or compact storage solutions.

Galley Width in Action: Spaceball One [Will feature photos and video in this section]

Our rental van, Spaceball One, showcases how our galley designs come together. This 148 Extended Transit features:

  • A compact galley layout with a kitchen bank, fridge bank, and extended countertop.
  • Smart placement of a Goal Zero 1500 power station to keep appliances running for weekend trips.
  • Upper cabinetry paired with standalone shelves to balance storage and openness.

By carefully arranging these components, we’ve created a functional space that feels open and inviting, perfect for families or solo adventurers.

Final Thoughts: 

Our entire cabinetry ecosystem is built to work seamlessly with our Smooth Rail Mounting System, making installation fast and straightforward. You can mix and match components to create a galley that fits your specific needs. With flat-packed DIY kits, we ship everything right to your door, so you can build your van on your schedule.

At Roost Vans, we believe galley width is about creating a space that works for your lifestyle. Whether you need ample storage for a family trip or a setup for solo adventures, our modular cabinetry system lets you customize your van without compromising comfort or functionality.

Ready to build your perfect galley? Check out our full range of products at roostvans.com and start your van journey today!

Deep Thoughts on Custom Batteries in Camper Vans

Powering your camper van is one of the most critical and complex decisions you’ll make in a build. It impacts everything from the appliances you can run to the length of time you can stay off-grid. At Roost Vans, we’ve refined our approach to power systems through years of experience, shifting from custom battery systems to favoring portable power stations. For the purpose of this article, we’ll focus on Goal Zero X series power stations, complemented by our innovative Roost Vans Power Panel.

Here’s why we take this approach and how our solutions can simplify and enhance your van life experience.

Custom Battery Systems vs. Goal Zero Power Stations

The Case for Custom Battery Systems

Custom battery systems can be tailored to specific power needs and fit unconventional spaces. They may work well for those with extreme requirements, such as running an air conditioner for eight hours straight. However, these setups come with significant drawbacks:

  • High Costs: Custom systems require extensive labor and premium materials, making them expensive to build. 
  • Complex Installation: Designing and installing these systems can take days, adding complexity to your build. 
  • Maintenance Challenges: Repairs and troubleshooting require specialized knowledge and tools, making them impractical for travelers far from a shop. 
  • Warranty Concerns: Custom systems lack the robust support infrastructure of factory-engineered solutions, leaving you on your own if something goes wrong.

Why We Recommend Portable Power Stations

Goal Zero X-Series power stations have become our preferred choice for most van builds. Here’s why:

  1. Cost-Effective: Mass production allows Goal Zero to offer high-quality, feature-rich products at a fraction of the cost of custom systems. 
  2. Compact and Efficient Design: These power stations are optimized for small spaces, making them ideal for camper vans. 
  3. Ease of Use: Plug-and-play compatibility with the Roost Vans Power Panel ensures a seamless integration process. 
  4. Advanced Features such as: Smart charging via the Link Module, which dynamically manages alternator load without overtaxing it allowing up to 70amp charging; Compatibility with solar, alternator, and shore power inputs; Mobile app integration for remote monitoring and control. 
  5. Reliable Support: Goal Zero’s customer service and warranty programs make it easy to troubleshoot or replace components if needed.

For most customers, a 1500x Goal Zero power station with 120 amp-hours is more than sufficient to power essentials like lighting, laptops, fridges, and vent fans for weekend adventures.

The Role of the Roost Vans Power Panel

The Roost Vans Power Panel is the heart of our power management system, designed to maximize the efficiency and usability of your van’s electrical setup. It works seamlessly with Goal Zero power stations, simplifying installation and operation while delivering robust performance.

What Is the Power Panel?

The Power Panel is a centralized hub that connects your power station to the rest of your van’s electrical system. It allows you to manage multiple inputs and outputs effortlessly, ensuring your power needs are met without the complexity of custom wiring.

Key Features of the Power Panel


  1. Easy Integration
    • Plug-and-play compatibility with Goal Zero power stations.
    • Works seamlessly with pre-installed wiring, making it ideal for phased builds. 
  2. Supports Multiple Recharging Options
    • Solar Power: Ideal for off-grid users, though limited by roof space and weather conditions.
    • Alternator Charging: The Link Module dynamically manages power from the vehicle alternator, ensuring p0werful and efficient charging without overloading the system.
    • Shore Power: The most reliable option for full recharging at campgrounds or other powered locations. 
  3. Compact Design
    • Optimized to fit within the limited space of a camper van.
    • Keeps your electrical system organized and accessible. 
  4. User-Friendly Features
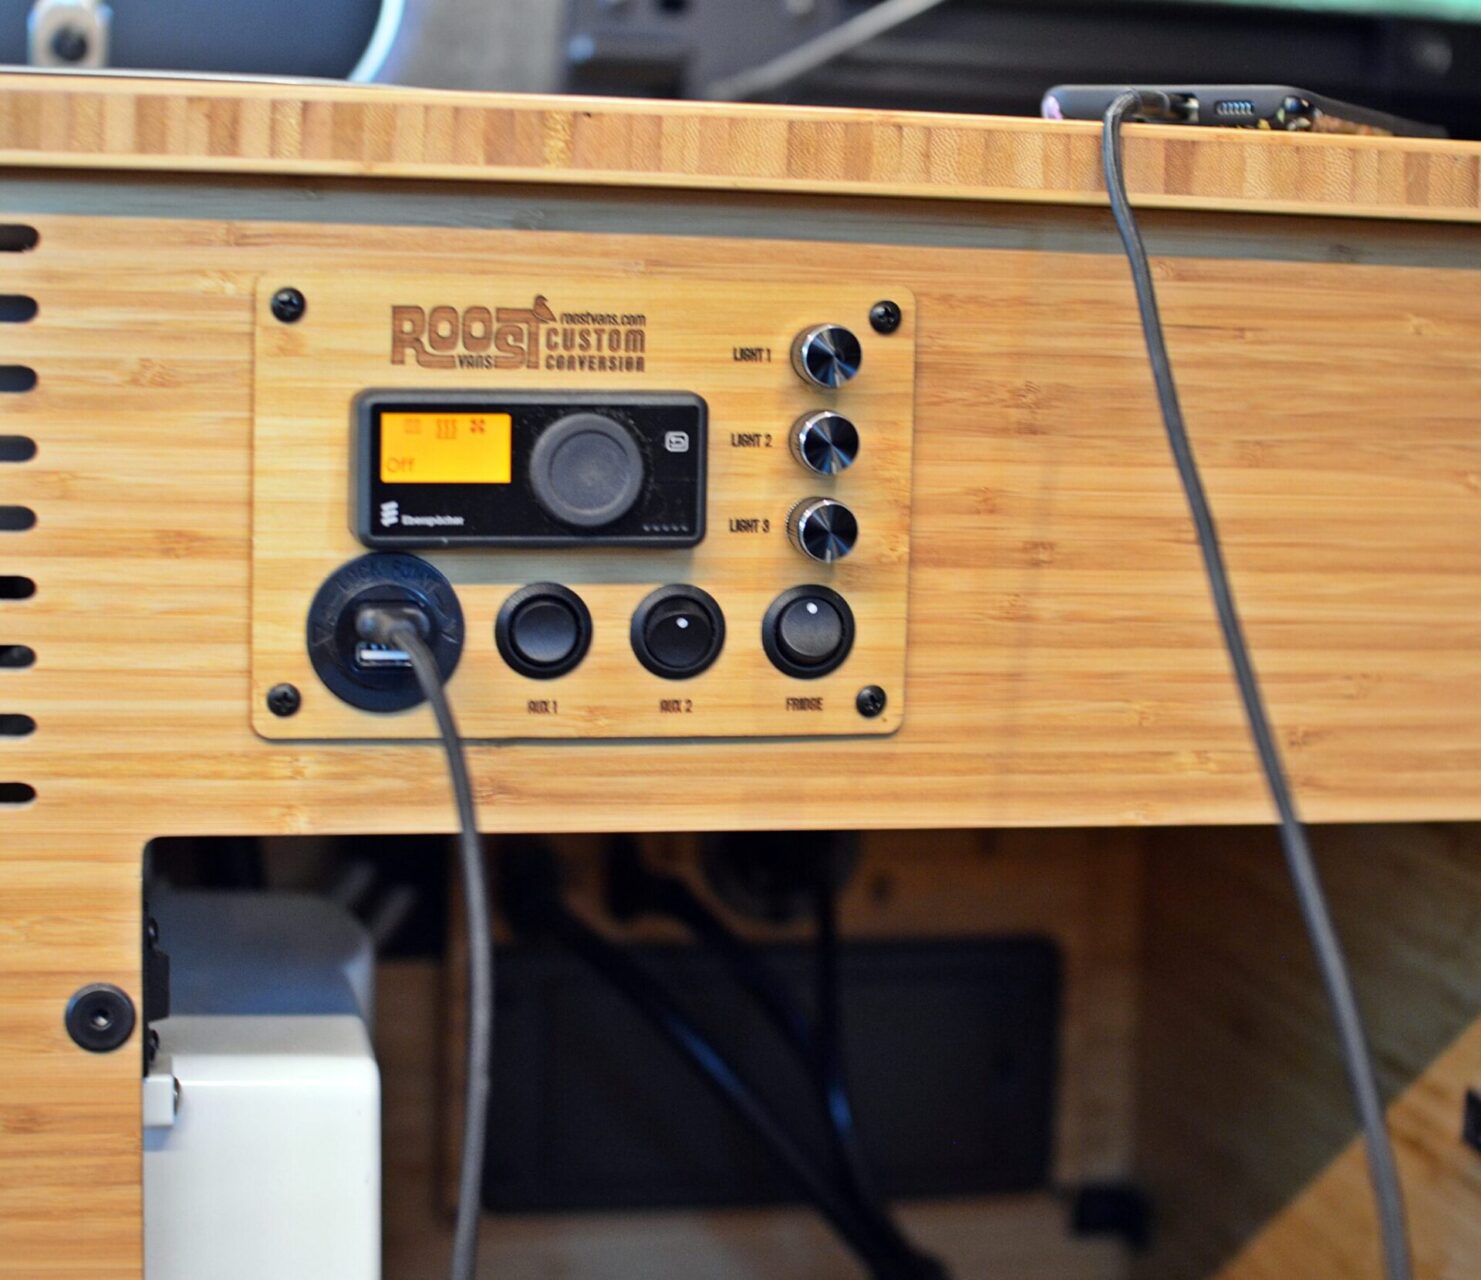
    • Centralized controls for managing power distribution.
    • Compatible with mobile apps for monitoring and adjusting settings remotely.

Why This Combination Works

At Roost Vans, our goal is to create practical, efficient, and budget-friendly solutions for van lifers. By combining Goal Zero power stations with the Roost Vans Power Panel, we offer:

  • Reliability: Factory-engineered power stations deliver consistent performance backed by a robust warranty and support network.
  • Efficiency: The Power Panel ensures seamless integration and management of your power system.
  • Cost-Effectiveness: This setup minimizes labor and material costs compared to custom systems.
  • Flexibility: Supports phased builds, allowing you to upgrade or expand your system as your needs evolve.

Final Thoughts

Powering your van doesn’t have to be complicated or prohibitively expensive. With a Goal Zero power station and the Roost Vans Power Panel, you get a system that’s easy to use, reliable, and scalable to meet your needs.

Whether you’re planning weekend getaways or extended off-grid adventures, this combination offers the perfect balance of simplicity, performance, and value.

Ready to power your van the Roost Vans way? Contact us or visit roostvans.com to learn more about our power solutions and start your build today!

Deep Thoughts on Showers in Vans

When building a camper van, one of the most debated features is whether or not to include a shower. At Roost Vans, we’ve taken a clear stance: we don’t install interior showers. Why? Because the challenges far outweigh the benefits, especially when considering the functionality, cost, space constraints and practicality of camper vans. Here’s an in-depth exploration of our reasoning and the alternative solutions we recommend.


Why We Don’t Do Showers in Vans


1. Space Constraints

Camper vans are all about maximizing a small footprint. Installing a shower requires significant infrastructure:

  • Dedicated Space: An enclosed shower takes up valuable real estate, reducing the usable living or storage space.
  • Visual Impact: A vertical shower wall interrupts the line of sight from one corner of the van to the other, making the space feel smaller and more cramped. At Roost Vans, we prioritize an open, uninterrupted design to maintain the feeling of spaciousness.

2. Minimal Usage

Through years of experience, we’ve found that showers in vans are rarely used. Most van owners rely on alternatives:

  • Campgrounds and State Parks: These locations often have full-size, comfortable endlessly hot shower facilities.
  • Natural Water Sources: Lakes, rivers, and beaches are popular for quick rinses and are very enjoyable.
  • Exterior Showers: More on this below, but outdoor setups often meet the need without the drawbacks of an interior shower.

3. Infrastructure Challenges

Adding a shower means introducing complex systems that are often impractical in a van:

  • Hot Water Systems: Heating water requires a substantial power source or propane setup, taking up space and adding weight. A typical 5-gallon hot water heater is bulky and only provides a short, underwhelming shower experience.
  • Drainage and Graywater Tanks: A shower doesn’t necessitate a gray water system to collect runoff, but it usually is highly desired. This adds more complexity, cost, and maintenance.
  • Moisture Control: Interior showers increase the risk of condensation, mold, and water damage, which are major concerns in small, enclosed spaces.

4. Cost vs. Value

The cost of adding an interior shower can easily run into the many many thousands, yet its functionality often falls short of expectations. At Roost Vans, we believe in investing those resources into features that provide greater long-term value, such as high-quality cabinetry, bed systems, or advanced power setups.


The Roost Vans Alternative: Exterior Showers

While we don’t install interior showers, we do offer a modular and practical solution: an exterior shower system.

How It Works

  • Water Tank: A 20-gallon over-the-wheel-well water tank that also supplies water to the interior sink.
  • Spray Port: The tank includes a spray port for versatile use—rinse off surfboards, bikes, pets, or muddy boots.
  • Hot Water Setup: For a full shower experience, we add an inline propane-powered hot water heater with showerhead and curtain for privacy.

Benefits of the Exterior Shower

  1. Compact and Flexible: Takes up minimal space inside the van while offering maximum functionality.
  2. Multi-Use System: The water tank serves both the sink and shower, maximizing utility.
  3. Efficient: Uses propane and water sparingly, making it ideal for off-grid camping.
  4. Practical Application: Perfect for rinsing off after a day at the beach, mountain biking, or other outdoor activities.


When an Interior Shower Might Make Sense

If you’re absolutely set on an interior shower, we recommend considering the Tetravan Folding Shower System. It’s one of the most innovative designs we’ve seen, offering a compact, fold-away solution. However, even with this option, there are still challenges with heating water and storing sufficient water for a satisfying shower.


Our Philosophy on Camper Vans

At Roost Vans, our design philosophy is rooted in practicality and efficiency. Camper vans are not RVs, and we aim to create functional, adventure-ready spaces that prioritize usability over unnecessary features. By omitting interior showers, we ensure that our vans:

  • Remain open and spacious.
  • Avoid unnecessary complexity and maintenance issues.
  • Deliver better value for your investment.


The Final Word on Showers in Vans

While the idea of a shower in your van may sound appealing, the reality often proves less glamorous. Instead of dedicating space and budget to an underused feature, consider the versatility and practicality of an exterior shower system. It’s efficient, flexible, and perfectly suited to the van life lifestyle.

Ready to build your dream van? Contact us or visit roostvans.com to learn more about our designs and solutions tailored to your adventure.

Sprinter vs. Transit: Choosing the Ideal Rig

Are you on the hunt for the perfect adventure vehicle to suit your lifestyle? Whether you’re a weekend warrior hitting the road for a few days or a family planning month-long excursions – the choice between a Sprinter and a Transit can significantly impact your travel experiences. As someone deeply entrenched in the world of van life, I’ve spent countless hours comparing these two iconic platforms. I’ve considered everything from engine performance and vehicle options to build costs and layouts. So, let’s dive into the nitty-gritty and explore which rig might be the best fit for you.

Size Matters: Maneuverability vs. Interior Space

The first consideration when choosing between a Sprinter and a Transit is often size. Both models offer various wheelbase options: from the compact 144 to the extended 170. While the larger wheelbase provides ample interior space for customization, it comes at the cost of maneuverability. Parking a 170-wheelbase Sprinter or a 148-extended Transit can be a challenge in tight spaces, even with the better maneuverability of the 148-ext. Whereas the shorter variants offer more agility on the road.

If you’re a solo traveler or a couple seeking a nimble daily driver, the Sprinter 144 or Transit 148 might be the way to go. However, for families or those requiring extra living space, the Sprinter 170 or Transit 148 extended body provides room to stretch out without sacrificing comfort. So, regarding size, both Sprinter and Transit are a close call.

Be aware, the 144 Sprinter interior is slightly shorter than the 148 Transit, and the 170 interior is slightly longer than the 148 extended Transit.

Engine Performance: Diesel vs. EcoBoost

When it comes to engine performance, the Sprinter’s diesel engine and the Transit’s EcoBoost offer distinct advantages. While the Sprinter diesel engines provide robust torque ideal for heavy towing, they can feel sluggish during acceleration. On the other hand, the Transit EcoBoost engine delivers responsive power, making highway passing a breeze.

In terms of fuel efficiency, both models fare relatively well. Mileage is affected by many factors of course. Ironically, we’ve found build weight to have the most minimal effect, with AWD/4WD and driving habits being next, and exterior accouterments and add ons that increase wind resistance having the most effect. In general, maintenance costs tend to tip the scale in favor of the Transit, with lower servicing expenses compared to the pricier Sprinter repairs and maintenance.

Drivetrain Options: All-Wheel Drive vs. Two-Wheel Drive

Another crucial factor to consider is drivetrain options. The Sprinter offers rear-wheel-drive and AWD/four-wheel-drive variants, while the Transit provides two-wheel drive, all-wheel drive, and the off-road-oriented Trail package.

For winter adventurers or off-road enthusiasts, the Sprinter’s selectable four-wheel-drive option offers added traction and stability when needed.

However, it still comes with a fuel economy penalty. Alternatively, the Transit’s all-wheel-drive system provides a confidence-inspiring grip without compromising as much fuel efficiency, making it an attractive choice for versatile travelers. We’ve been finding however that the Trail variant has an additional mileage hit over the AWD Transit.

Build Costs: Budgeting for Your Dream Rig

Lastly, let’s talk about build costs. While both platforms offer endless customization possibilities, the Sprinter tends to be more budget-friendly in terms of labor and materials. The Transit’s slightly more complex design and construction result in higher build costs, which may be a factor for your budget.

In this category, Sprinter takes the lead.

Conclusion: Finding Your Perfect Adventure Companion

In the end, choosing between a Sprinter and a Transit boils down to your individual needs and preferences. If you prioritize interior space and off-road capabilities, the Sprinter might be the ideal companion for your epic journeys. However, if maneuverability, engine responsiveness, and budget-friendly maintenance are your top priorities, the Transit could be your ticket to van life bliss.

No matter which platform you choose, embarking on the van life adventure opens up a world of possibilities, from remote wilderness camping to urban exploration. So, weigh your options carefully, test drive both models if possible, and embark on the journey of a lifetime with your dream rig by your side. Happy travels!

When ordering your van however, a couple of things to consider:

  • Order a van with factory swivel seats if possible.
  • Fixed windows in the driver side sliding door and rear doors is a good option as the van builder can add vented windows elsewhere.
  • Sprinter factory roof rails from the factory allow for installation of roof racks and solar panels.

Ordering Your Adventure Van: What to Consider

Ordering a custom rig for your adventure lifestyle is an exciting process, but it requires careful consideration. Let’s dive into what you should think about before placing your order.

Vehicle Options

When choosing between Sprinter and Transit, consider the available options that are practical for a van build. Sprinter offers 144 and 170 wheelbases, both in high roof. There is also a 170 extended version, although rare.Although offered, we have found that the Sprinter Mid roof does not have enough clearance for a campervan build.

Transit offers a 148 wheelbase available in regular length in a high and mid roof configuration, or extended length in a high roof config. Decide which configuration best suits your needs. Both of these rigs interior spaces are very close for general building considerations.

Roof Height

Opting for a high roof provides more headroom and space for customization. Transit’s high roof offers slightly more headroom than Sprinters, providing additional comfort and versatility. While the Transit’s mid roof option is often just fine for people about 5’9” or less.

Layout Considerations

Think about how you plan to use the space inside your rig. Consider factors like the number of passengers, a second row seat, sleeping and storage needs, and desired amenities. Visualize your ideal layout to ensure it meets your requirements. Be aware that a 2nd row bench seat if not needed, can have a big and often detrimental impact on your layout. Consider this carefully if it us not going to be used most of the time.

Drivetrain Options

Evaluate the available drivetrain options, such as rear-wheel drive, all-wheel drive, or four-wheel drive. Choose based on your intended usage, considering factors like terrain, weather conditions, and driving preferences. Oftentimes customers are quite satisfied with the improved mileage of a 2wd option and utilizing winter tires, bringing chains, or swapping out for studded tires in the winter months.

Engine Performance

Assess the engine options and their performance characteristics. Consider factors like power, torque, fuel efficiency, and responsiveness. Determine which engine aligns best with your driving style and performance expectations. We’ve found the performance of the Ford 3.5L EcoBoost has done quite well for our van building needs with plenty of power without the need for DEF in needed for diesel engines.

Budget Considerations

Establish a budget for your custom rig, considering both the initial purchase price and potential long-term costs, as well as upfitting costs. Account for factors like maintenance, repairs, fuel economy, and insurance premiums. Ensure your budget aligns with your financial goals and priorities. And most of all, leave enough budget to build out your vehicle. A common technique is to finance the vehicle while leaving cash reserves for the build.

Customization Potential

Research the customization options available for your chosen platform. Consider factors like interior layout, exterior features, upgrades, and accessories. Explore aftermarket options and modifications to personalize your rig to your preferences.

Resale Value

Consider the potential resale value of your custom rig. Choose options and features that appeal to a broad audience to maximize resale potential down the line. Opt for upgrades and modifications that enhance value without overcapitalizing.

Test Drive

Before placing your order, schedule test drives of both Sprinter and Transit models to experience their handling, comfort, and performance firsthand. Pay attention to details like driving dynamics, ergonomics, and overall feel to make an informed decision. This is such a subjective call, but we’ve found that the Sprinter platform differences in 2wd vs 4wd drive quite different out of the box, while the Transit 2wd and AWD are almost identical.

Consultation

If you’re unsure about any aspect of the ordering process, seek guidance from experienced professionals or fellow enthusiasts. Consult with van builders, dealerships, or online communities to gather insights and advice.

In conclusion, ordering a custom rig requires careful consideration of various factors, including vehicle options, roof height, layout, drivetrain, budget, customization potential, resale value, test drives, and consultations. By thoroughly evaluating these aspects, you can ensure that your adventure rig meets your needs and preferences, providing you with countless memorable journeys on the open road.